This site is supported by our readers. We may earn a commission, at no cost to you, if you purchase through links.
 To sharpen clipper blades effectively, start by removing the blades from the clipper.
If you’ve got a magnet holder, it’s handy—otherwise, hold them steady.
Glide the blade along a coarse honing stone, ensuring an even, gentle pressure.
If you’re aiming for razor-sharp precision, follow up with a fine honing stone.
Brush off any metal fragments, then reattach the blade.
A couple of drops of hair clipper oil will keep it purring like new.
Run the clippers to test the sharpness, and you’re set!
Keep sharpening simple with these straightforward tips, because nobody likes a botched buzz cut.
Curious about more angles?
Table Of Contents
- Key Takeaways
- Why Sharpen Clipper Blades
- Choosing The Right Sharpening Tool
- Preparing Clipper Blades for Sharpening
- Sharpening Clipper Blades With a Stone
- Alternative Sharpening Methods
- Sharpening Clipper Blades at Home
- Maintaining and Caring for Clipper Blades
- Self-Sharpening Hair Clippers
- Sharpening Frequency and Tips
- Frequently Asked Questions (FAQs)
- How to sharpen Clippers?
- Should you sharpen your hair clipper blades?
- How to sharpen hair clipper blades with a whetstone?
- How to sharpen electric clipper blades with a sharpening stone?
- How do you sharpen clipper blades at home?
- How do you sharpen Wahl clippers?
- How do I make my barber clippers sharper?
- How to sharpen clipper blades with aluminum foil?
- What signs indicate clipper blades need sharpening?
- Can rusted blades still be sharpened?
- Is heat produced during blade sharpening normal?
- Are ceramic blades sharpened differently from metal ones?
- Can clipper blades be sharpened using household items?
- Conclusion
Key Takeaways
- You’ll need the right tools: Choose from whetstones, electric sharpeners, or even sandpaper, depending on your needs and budget.
- Clean your blades thoroughly before sharpening: Remove all hair and debris for best results.
- Maintain the correct angle: Consistent angle is crucial for even sharpening and preventing damage.
- Regular sharpening is key: Sharpen your blades every few weeks (or sooner if you notice dullness) to maintain peak performance and extend their lifespan.
Why Sharpen Clipper Blades
You’ll find that sharpening clipper blades is essential to maintain a clean, efficient cut, preventing hair tugging and uneven results.
Keeping the blades sharp also extends their lifespan and provides a smooth grooming experience every time.
Signs of Dull Blades
Ever felt that nagging tug while trimming?
That’s your clipper’s dull blades crying out for help.
From hair pulling and uneven cuts to noticeable blade vibration, signs of wear are your cue for action.
Those pesky faded lines can ruin a haircut.
Regular sharpening with the right clipper blade sharpening tools and techniques fixes these issues but also ensures precision.
Keep your clippers sharp and your cuts flawless.
Consequences of Using Dull Blades
Dull clipper blades lead to frustrating results.
You’ll experience hair pulling, resulting in uneven cuts and potentially skin irritation.
The added stress causes blade overheating and eventual clipper damage.
To prevent these issues, consider investing in a clipper blade sharpener tool, such as those found on the clipper blade sharpener.
Maintaining sharp clipper blades prevents these issues.
Regular clipper blade sharpening is key.
Proper clipper blade sharpening techniques guarantee smooth, precise cuts.
Investing in sharp clipper blades and using appropriate clipper blade sharpening benefits you and your clients.
Benefits of Sharpening Clipper Blades
Keeping your clipper blades sharp is like giving them new life.
Regular sharpening guarantees cleaner cuts, smoother fades, and a longer blade life.
You avoid the hassle of pulling, improving your overall performance.
Identifying signs of dull blades, such as uneven cuts and hair snags, is essential to maintaining sharp clippers, which can be done by learning how to sharpen clipper blades.
- Cleaner cuts lead to precise styling with ease.
- Smoother fades enhance your grooming prowess.
- Longer blade life reduces frequent replacements, saving on clipper sharpening costs.
Keep your blades in tip-top shape with these techniques!
Choosing The Right Sharpening Tool
When it’s time to sharpen your clipper blades, selecting the right tool is essential for achieving a precise edge.
You’ll weigh the benefits of handheld sharpeners, electric options, and honing rods to find the best fit for your sharpening needs.
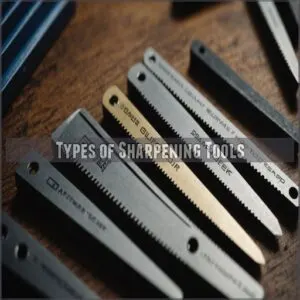
Types of Sharpening Tools
Choosing the right sharpening tool for clipper blades can feel overwhelming, but knowing your options makes it simpler.
From sharpening stone types like whetstones that revive dull edges to electric sharpeners with advanced features, the right tool can make all the difference.
Honing rods help maintain sharpness, ideal for touch-ups.
Explore DIY sharpening tools or turn to professional sharpening services if needed.
Each tool offers a unique approach to clipper blade sharpening.
Handheld Vs Electric Sharpeners
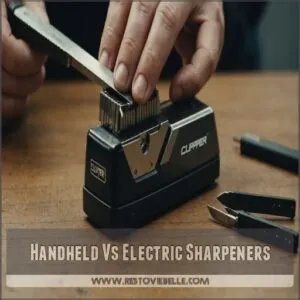
Comparing handheld and electric sharpeners reveals key differences that impact price, speed, and precision.
Handheld sharpeners, often affordable and easy to maintain, grant you precise control but demand more time and effort.
Electric sharpeners, though pricier, offer unparalleled speed and convenience, making them ideal for quick touch-ups.
Consider your priorities—if maintenance is manageable, handheld might suit you; if speed and ease reign, electric is your tool of choice for clipper blade sharpening.
Honing Rods and Their Uses
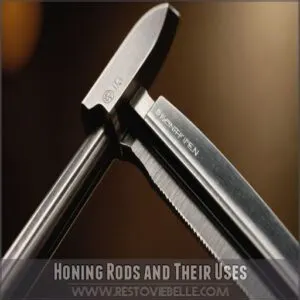
Using honing rods offers a practical edge for clipper blade sharpening.
These rods, usually made from steel, help realign the blade’s edge without removing metal.
Unlike stones, they’re ideal for frequent touch-ups, maintaining blade sharpness efficiently.
A honing rod technique involves consistent, gentle strokes, which extend blade life.
Regular maintenance keeps rods effective, making them a reliable part of your clipper blade sharpening guide.
Preparing Clipper Blades for Sharpening
Before you begin sharpening, make sure to carefully clean your clipper blades by removing all hair and debris, then give them a good scrub with soapy water or an alcohol solution.
Once they’re squeaky clean, mark the blade’s sharpening area with a marker and lubricate your sharpening stone to ensure a smooth, effective honing process.
Removing Hair and Debris
Now that you’ve selected your sharpening tools, let’s prep those blades.
Before sharpening, you need a pristine surface.
Remove all hair and debris.
Think of it as a pre-op for your blades.
For the best sharpening results, you should apply a few drops of clipper blade oil on clean blades after each use.
Here’s how:
- Use a stiff brush to sweep away loose hair.
- Employ compressed air to blast out stubborn bits.
- Consider using a lint-free cloth for a final wipe down.
- Inspect carefully for any lingering debris.
You want a clean slate for the best sharpening.
Cleaning and Lubricating The Blades
Cleaning your clipper blades is essential before sharpening.
First, grab a stiff toothbrush and some blade cleaning solution.
Brush away any hair or debris, ensuring every nook is spotless.
Rinse with warm water if needed, then dry thoroughly.
Next, choose a high-quality clipper oil.
Apply a few drops evenly across the blades, distributing with a clean cloth.
Regular hair clipper cleaning and lubrication increase blade longevity, reduce friction, and improve cutting performance.
Marking The Sharpening Area
Sure, you cleaned and lubed the blades, but what next? Grab your marker and let’s pinpoint where sharpening happens. It’s like drawing a treasure map, but for sharper edges.
- Choose the right marker: Not all markers are created equal.
- Technique matters: Keep your hand steady.
- Mind the area size: Cover all important parts.
- Easily removable: You don’t want permanent art here.
Sharpening Clipper Blades With a Stone
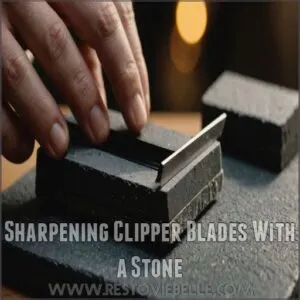
Sharpening clipper blades with a stone is a precise method that guarantees your tools stay effective.
You’ll need a steady hand and the right technique, using a 3000/8000 grit whetstone lubricated with water or oil, to skillfully glide the blade across the stone until it’s sharp and ready for action.
Using a Whetstone or Sharpening Stone
Sharpening clipper blades with a whetstone requires precision.
Begin by choosing the right grit selection—3000 to 8000 grit works wonders.
Place the blade flat against the stone, paying attention to stone angles.
Glide it using a back-and-forth technique.
Here’s a simple table to guide you:
| Whetstone Types | Stone Angles | Grit Selection |
|---|---|---|
| Japanese | Low | 3000-8000 |
| Arkansas | Medium | 4000-6000 |
| Diamond | High | 6000-8000 |
Lubricating The Stone
Before sharpening, decide between water or oil to lubricate your stone.
This choice impacts the stone’s longevity and the sharpening quality.
Water works well for most stones, but oil can offer smoother action on harder types like diamond stones.
When choosing between clippers, consider those with ceramic or stainless steel blades for longevity, such as the top barber clippers.
Apply the lubricant generously and often during sharpening; this maintains the stone’s efficiency.
Remember, proper application guarantees your sharpening process won’t become more of a chore than necessary.
Sharpening Techniques and Angles
Getting your clipper blades razor-sharp isn’t rocket science—just a careful dance with angles and grit.
Hold your blade firmly, maintaining a consistent angle as you glide it across the sharpening stone.
This helps maintain even wear and keeps your angles crisp.
- Blade angle consistency: Key for that professional finish.
- Sharpening stone selection: Match the grit to your needs.
- Proper blade hold: Steady hands create stellar cuts.
Alternative Sharpening Methods
Sometimes, a whetstone isn’t readily available, so let’s explore some alternative blade-sharpening techniques, including using sandpaper, aluminum foil, or even an electric sharpener, which requires a powerful motor with high RPM, similar to the closest electric shaver for achieving razor-sharp clipper blades.
These methods provide viable options for maintaining your clippers’ cutting power, especially when traditional sharpening tools are unavailable or impractical.
Using Sandpaper or Emery Paper
Sharpening with sandpaper offers a straightforward approach when stones feel cumbersome.
Grab sandpaper or emery paper, noting the grit size; this affects how finely you sharpen.
Lay it flat, a little oil might help, and rub the blades.
Keep an eye on the blade angle to hit the mark.
Here’s a quick guide:
| Step | Material | Duration |
|---|---|---|
| Lay Sandpaper | Sandpaper grit | 5 minutes |
| Rub Blades | Emery paper | 30 seconds each |
| Wipe Clean | Cloth/Rag | 2 minutes |
Don’t forget safety precautions, and voilà, you’re set!
Sharpening With Aluminum Foil
You might be skeptical about sharpening with aluminum foil, yet it’s surprisingly effective.
Take a sheet and fold it several times, creating layers.
Glide your blade across the foil, repeating the process to enhance sharpness.
This technique is gentle on blades, presenting an easy alternative to stones.
Remember, foil sharpening safety is important, especially for ceramic blades.
So, give foil a go—it’s a handy, low-risk option.
Electric Sharpeners and Their Uses
Switching from aluminum foil to electric sharpeners can be a game-changer.
Electric sharpener types vary widely, delivering quick, consistent results that manual methods can’t match.
Consider maintenance and cost, as electric models require care but save time.
Weigh the electric vs manual debate carefully.
Always adhere to safety precautions, like unplugging before blade placement.
Thoughtful use sharpens efficiently and extends the life of your clippers.
Sharpening Clipper Blades at Home
Sharpening clipper blades at home isn’t as complicated as it sounds.
With the right tools and techniques, you’ll have them cutting like new.
By carefully following these steps, you can maintain your clippers’ performance and save on professional sharpening costs.
Step-by-Step Guide to Sharpening
Getting those clipper blades sharp at home might sound like a chore, but with the right steps, you’ll be slicing through hair like butter.
Start by unscrewing the blades and wiping them clean, making sure to remove any debris that may affect the sharpness of stainless steel blades.
Using a sharpening stone, maintain the right blade angle for efficiency. Keep an eye on the marker highlight to guarantee precision.
Safety Precautions and Tips
A few important safety tips make sharpening clipper blades at home safe and effective.
Always unplug your clippers before starting to guarantee blade safety.
Select the right tools, focusing on your sharpening angle to avoid injury.
Keep a regular cleaning routine to prevent build-up, and don’t forget lubrication after sharpening.
- Unplug clippers first
- Pick the right tools for control
- Maintain a clean, lubricated blade
Common Mistakes to Avoid
One common pitfall is using the incorrect angle, leading to uneven sharpening.
Over-sharpening weakens the blade.
Never force the blade; gentle pressure is key.
To keep your blades in top condition, use the right clipper blade lubricant.
Neglecting cleaning before sharpening dulls the stone faster.
Using the wrong oil can damage the blade’s finish.
Avoid these mistakes for consistently sharp clippers.
Remember, patience and precision are paramount!
Maintaining and Caring for Clipper Blades
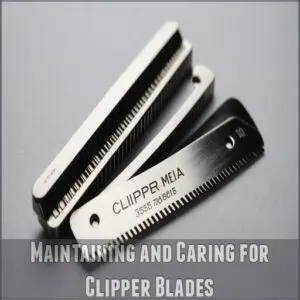
To keep your clipper blades in top shape, it’s essential to clean them regularly and oil them after every few uses to prevent rust and friction.
If you notice any significant wear or damage, don’t hesitate to replace the blades, ensuring your cuts remain sharp and efficient.
Storing The Blades Properly
Properly oiling your beard trimmer blades, such as by applying 4-5 drops of quality trimmer oil, can help to prevent overheating and reduce friction, making storing clipper blades properly is key to prolonging their life.
After sharpening, make sure they’re thoroughly dried to prevent rust.
A good blade storage solution involves using a moisture-free environment; silica gel packs work wonders here.
Opt for sturdy storage container types—plastic or metal cases provide the best protection.
Avoid leaving blades loose to dodge damage and wear.
When organizing, remember that neatness counts—a well-arranged tool setup helps you master quick blade swaps.
Implement these best storage practices and you’ll guarantee your blades stay in top condition, ready for any haircutting challenge you face.
Replacing The Blades When Necessary
After making sure your clipper blades are safely stored, it’s time to discuss when to replace them.
Recognizing signs of wear, like uneven cuts or excessive tugging, is key to maintaining blade quality.
When sharpening no longer restores performance, replacement becomes necessary.
Consider the blade lifespan and replacement cost—sometimes DIY solutions work, but pro replacements might ensure longer life.
Weigh the DIY vs. pro choice carefully, keeping blade quality in mind.
Frequent use can speed up wear, so monitor closely.
Evaluating these factors helps you maintain high-quality clippers, efficiently mastering the art of grooming with minimal hassle.
Self-Sharpening Hair Clippers
You might think self-sharpening hair clippers are a dream come true for hassle-free grooming.
While these tools reduce the frequency of manual maintenance, it’s important to understand their benefits and limitations to make sure your clippers perform at their best.
What Are Self-Sharpening Clippers
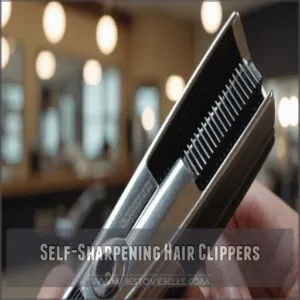
Self-sharpening clippers stand out with a built-in mechanism that keeps the blades sharp without extra work on your part.
This feature guarantees that your clipper blades retain their edge longer, minimizing maintenance needs.
While you still need to clean and oil them regularly, the self-sharpening mechanism is a game-changer.
Focus on quality over cost, as these clippers can vary widely, impacting blade lifespan and overall performance.
Benefits and Drawbacks of Self-Sharpening Clippers
You’ve discovered self-sharpening clippers, but are they the real deal or just smoke and mirrors?
These clippers simplify maintenance with built-in sharpening that boosts longevity, offering a nice balance between cost vs. performance.
Blade quality isn’t always excellent, though, impacting user experience slightly.
While convenient, they mightn’t serve professionals chasing impeccable precision.
Weigh these factors before jumping aboard the self-sharpening train for your grooming needs.
Maintenance Tips for Self-Sharpening Clippers
Even though they’re self-sharpening, regular maintenance extends their lifespan.
Clean your blades frequently—think every few uses—to remove hair and debris.
Use a high-quality clipper oil; avoid heavy oils that could clog the self-sharpening mechanism.
Proper storage, in a dry case, protects the blades from damage.
These simple steps keep your self-sharpening clippers running smoothly, ensuring consistently sharp cuts.
Different self-sharpening blade types may need slightly varied cleaning frequencies.
Sharpening Frequency and Tips
To keep your clipper blades in top shape, it’s important to sharpen them every few weeks or whenever you notice they’re dragging through hair.
Following these detailed tips will help guarantee your blades remain as sharp as a pro’s, preventing dullness and ensuring smooth cuts.
How Often to Sharpen Clipper Blades
You might wonder, how often should you sharpen clipper blades? Well, it depends on how frequently you use them. Regular users should aim for every few weeks, while occasional users might wait 3-6 months. Quality matters too; higher-grade blades last longer.
Here’s your quick frequency guide:
- Frequent use requires more sharpening.
- Quality blades extend sharpening intervals.
- Sharpening tools affect frequency.
- Regular checks prevent dulling surprises.
Signs That The Blades Need Sharpening
Hair pulling, uneven cuts, and tugging suggest your blades need sharpening.
Listen for changes in blade noise; unusual sounds signal it’s time.
Faded lines are your red flags.
Don’t wait!
Here’s a quick reminder:
| Issue | Symptom | Action Needed |
|---|---|---|
| Hair Pulling | Tugs or snags hair | Sharpen immediately |
| Uneven Cuts | Jagged lines | Check blade status |
| Blade Noise | Louder than usual | Inspect for dullness |
Keep your clippers performing their best!
Tips for Sharpening Clipper Blades Like a Pro
It’s time to tackle sharpening, ensuring your clippers are as sharp as they can be. Here’s how you can do it like a pro.
- Frequency Matters: Sharpen blades monthly or every 3-6 months based on use.
- Materials & Angles: Different blade materials need specific sharpening angles, so choose the best sharpening stones wisely.
- DIY vs. Pro: Weigh the cost, effort needed, and your comfort level before deciding.
Frequently Asked Questions (FAQs)
How to sharpen Clippers?
Hark, fellow barber!
To hone your clippers, first, thoroughly clean them.
Then, using a whetstone, gently glide the blades across its surface, lubricating as needed.
Should you sharpen your hair clipper blades?
To achieve a precise cut for skin fades using the best clippers for fades, it’s essential to work with sharp blades. Absolutely, you should sharpen your hair clipper blades.
Dull blades pull hair, creating discomfort and uneven cuts.
Regular sharpening guarantees precision, prolongs blade life, and guarantees a smooth, effortless grooming experience.
Keep those clippers in tip-top shape!
How to sharpen hair clipper blades with a whetstone?
Did you know sharpening a blade can reduce haircut time by 20%?
To sharpen with a whetstone, lubricate it, press the blade flat, and glide back-and-forth until sharpness returns, then clean thoroughly.
How to sharpen electric clipper blades with a sharpening stone?
First, remove the clipper blades and clean them thoroughly.
Use a 3000/8000 grit sharpening stone, and glide the blades back and forth at a slight angle.
Lubricate with water or oil, and reassemble after sharpening.
How do you sharpen clipper blades at home?
Imagine gliding those dull clipper blades across a whetstone, feeling the magic of metal-on-stone.
Unscrew and clean blades thoroughly.
Then sharpen with a 3000/8000 grit stone.
Reassemble, oil, and test them—sharp as the day you bought them!
How do you sharpen Wahl clippers?
Sharpening your Wahl clippers involves detaching the blades, cleaning them well, and then using a whetstone or sandpaper to sharpen.
Keep the angle steady, glide the blade, and test it frequently for best results.
How do I make my barber clippers sharper?
You’ll need a screwdriver, toothbrush, and sharpening stone.
Detach and clean the blades.
Then use a whetstone or sandpaper, and move back and forth until sharp.
Reassemble, oil the blades, and test them.
How to sharpen clipper blades with aluminum foil?
Aluminum foil isn’t ideal for sharpening clipper blades; it’s too soft. Use a whetstone or professional sharpening service for best results. Proper blade maintenance extends their lifespan.
What signs indicate clipper blades need sharpening?
Imagine your clippers as a trusty steed, losing its gallop when blades drag, pull hair, overheat, or leave uneven cuts.
If they make excessive noise or require more force, it’s time to sharpen them.
Can rusted blades still be sharpened?
Rusted blades can indeed be sharpened, but first, you need to remove the rust.
Use a stiff brush and some light sandpaper to clean them up.
Once rust-free, sharpen as usual on a whetstone.
Is heat produced during blade sharpening normal?
You bet heat’s normal during sharpening!
That friction between the blade and stone creates warmth, reminding you of hard work’s payoff.
Just make sure the metal doesn’t warp—keep cooling it down with water or oil.
Are ceramic blades sharpened differently from metal ones?
Ceramic blades require a different approach than metal ones.
Ceramic blades require a different approach than metal ones.
Use a diamond sharpening stone instead of a whetstone.
Carefully lubricate the stone and glide the blade back and forth, ensuring gentle pressure to avoid damaging the ceramic material.
Can clipper blades be sharpened using household items?
Ever felt like life’s simple pleasures, like sharpening clipper blades at home, can be a breeze?
Grab your trusty screwdriver, a stiff toothbrush, and sandpaper.
With these, you’ll restore those dull blades’ glory right quick!
Conclusion
Did you know 30% of grooming problems come from dull blades?
Keeping your clippers sharp prolongs their life and guarantees a perfect cut every time.
By learning how to sharpen clipper blades, you’re saving money but also improving your grooming game.
Remember, whether it’s using a whetstone, sandpaper, or even aluminum foil, regular maintenance keeps your blades in tip-top shape.
So, stay sharp, and let those clippers glide effortlessly!
