This site is supported by our readers. We may earn a commission, at no cost to you, if you purchase through links.
To create stunning coontails, you’ll need to gather your materials, select and prepare your hair strands, apply the coontail dye, and try the mascara technique**.
Start by selecting 1-inch thick strands and bleaching them for a brighter color. Comb your hair to separate strands and secure with clips or ponytails. Divide your hair into sections, protect surrounding hair, mix a small amount of dye, and apply it to gaps between tape. Wait for the instructed time and repeat for more definition.
For the mascara technique, isolate a hair section, apply white mascara to bleach, and create black streaks with black mascara. Comb the area gently to soften.
Explore color inspirations like classic black and grey, blonde and brown combinations, and vibrant rainbow coontails. Maintaining your coontail style is essential, so continue learning to perfect your look.
Table Of Contents
- Key Takeaways
- How to Do Coontails?
- Exploring Raccoon Tail Hair
- Gathering Your Coontail Materials
- Selecting and Preparing Hair Strands
- Applying the Coontail Dye
- Creating Coontails With Mascara
- Raccoon Tail Hair Color Inspirations
- Maintaining Your Coontail Style
- Frequently Asked Questions (FAQs)
- Can I use a different color for the coontail pattern other than black?
- How long does it take for the coontail dye to dry before I can remove the tape?
- Can I use a different type of tape for the stencil, like duct tape?
- Can I use a different type of mascara for the coontail pattern, like a gel or liquid mascara?
- Can I create coontails on short hair extensions?
- Conclusion
Key Takeaways
- Select 1-inch thick strands for thorough coverage and straighten them for uniform dyeing.
- Divide your hair into sections, protect surrounding hair with tape, mix a small amount of hair dye, and apply it to gaps between the tape. Wait for the instructed time and repeat for more definition.
- For mascara coontails, use duo mascara (white and black), a comb, and follow the instructions provided. Remember to use clean mascara wands for each color, allow the mascara to dry before combing, and use a fine-toothed comb for precision.
- Explore color inspirations like classic black and grey, blonde and brown combinations, and vibrant rainbow coontails.
How to Do Coontails?
To create coontails, follow these steps:
- Choose the color for your coontails based on your hair color. For dark hair, consider red, light blue, neon green, pink, light purple, yellow, orange, or light blonde. For light hair, all colors will suit.
- Straighten your hair with a hair straightener to make it easier to apply the coontails.
- Bleach the hair you want to have coontails on. This may require several processes if you have dark hair. Wait until your hair turns bright like blonde.
- Apply scotch tape to the areas of your hair where you don’t want the coontails. Make sure the tape is tight, as it will come off when rinsed.
- Use a hair dye brush or new painting brush to apply the dye to the non-taped areas of your hair. Spread the dye gently but boldly.
- Wait for 30 minutes before rinsing the dye off. The scotch tape will come off by itself when rinsed.
- Towel dry your hair gently, avoiding using a hairdryer.
Remember to follow safety precautions when bleaching and dyeing your hair, and consider seeking professional help if you’re unsure about doing it yourself.
Exploring Raccoon Tail Hair
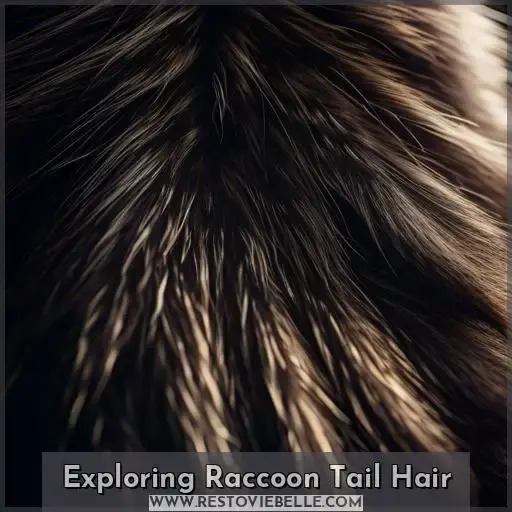
Embark on the realm of coontails, a fearless and audacious color technique that showcases contrasting horizontal highlights against your base hair hue. Whether you desire ephemeral coontails without pigmentation or enduring ones, there’s a coontail style for every taste.
From timeless black and gray to blonde and brown combinations, and even radiant rainbow coontails, the options are boundless. Coontails can be lightened, colored, or fastened in, and frequently complement side-swept bangs and a slicked-back crown.
Whether you favor coontail enhancements or embrace the lineage and customs behind raccoon tail hair, it’s undeniable that coontails are a distinctive and captivating means of manifesting your individuality.
Gathering Your Coontail Materials
To create stunning coontails, you’ll need a variety of materials. Here’s a list of what you’ll need:
- Old shirt
- Towel (optional)
- Comb
- Hair clips and ponytails
- Tape
- Hair dye
- Gloves
- Straightener
For strand selection, choose 1-inch thick strands. Bleach strands for brighter color and comb to separate hair.
For hair preparation, secure hair with clips and ponytails, and straighten strands for even dyeing.
For dye application, wrap tape around areas to protect hair, mix a small amount of hair dye, and apply dye to gaps between tape. Wait for the instructed time.
For finishing, rinse, wash, and condition hair, remove tape, dry hair, and enjoy your coontail pattern.
For mascara coontails, use duo mascara (white and black), a comb, and follow the instructions provided.
Remember to use clean mascara wands for each color, allow mascara to dry before combing, and use a fine-toothed comb for precision. Experiment with different mascaras for effects.
Coontails are a bold and daring color style with horizontal highlighted strands that contrast against the base hair color. They can be bleached, dyed, or clipped in, often accompanied by side-swept fringe and combed back top.
Selecting and Preparing Hair Strands
You’ll start by selecting strands of hair about an inch thick, which you can bleach for more vivid color if your hair is dark. Next, secure the rest of your hair out of the way with clips and ponytails, then straighten the chosen strands to guarantee the dye applies evenly.
Strand Selection
To create captivating coontails, you’ll first need to select and prepare your locks. Begin by choosing 1-inch thick strands for thorough coverage. If you’re aiming for a more vibrant color, consider lightening some strands. Use a comb to separate your hair and straighten strands for uniform dyeing.
Safeguard your hair with tape to prevent inadvertent dyeing of unwanted areas. Remember, coontails are all about contrast and boldness, so don’t be afraid to experiment with various methods and colors.
Hair Preparation
Before embarking on the journey of coontails, it’s essential to prime your hair for the transformation. Start by segmenting your hair with clips or ponytails, ensuring a tidy and organized foundation. For striped hair, select 1-inch thick swatches and bleach them for a more vibrant hue.
Shield your hair with masking tape or clear tape, and straighten your strands for uniform dyeing. Remember, timing is paramount for achieving the desired coontail color style.
Regardless of whether you’re utilizing human hair wigs or extensions, meticulous preparation is vital for a successful coontail makeover.
Applying the Coontail Dye
To apply coontail dye, follow these steps:
- Divide your hair into sections and protect surrounding hair with foil or clips.
- Mix a small amount of hair dye according to the instructions on the package.
- Apply the dye to the gaps between the tape, ensuring each stripe is evenly spaced.
- Wait for the instructed time, usually 30 minutes, for the dye to develop.
- Rinse, shampoo, and condition your hair.
- Remove the tape carefully to avoid bleeding (dye running to lighter sections).
- Dry your hair and enjoy your coontail pattern.
For a more natural raccoon tail effect, blend the edges of each color slightly. If you have dark hair, use a 30-40 vol. developer with bleach to lighten it, and for light hair, apply black hair dye.
Dye Application
To create stunning coontails, first make sure the dye consistency is correct. Use application tools like brushes or gloves for accuracy. Bleach strands for more vibrant colors, or select hair dye based on your base hair color. For dark hair, use a 30-40 vol. developer with bleach, while black hair dye works for light hair.
Tape placement is essential to shield hair from dye. Choose honey hair colors for a natural appearance or bright hair colors for boldness.
Finishing Touches
After dyeing your coontails, it’s time for the final touches. Here’s a 3-step guide to finishing your coontail style:
- Rinse, Wash, and Condition: Rinse your hair with warm water, then shampoo and condition it as usual. Use a conditioner that suits your hair type and color.
- Remove Tape and Accessories: Carefully remove the tape and hair clips. Be gentle to avoid damaging your coontails or hair.
- Dry and Style: Air-dry your coontails or use a blow dryer on a low heat setting. Apply styling products, such as hair oil or serum, to keep your coontails looking sleek. For a more exaggerated look, try using hair accessories like bows or clips. Remember to maintain your coontail color with regular touch-ups and color maintenance treatments.
Creating Coontails With Mascara
To create coontails with mascara, you’ll need a duo mascara with both white and black mascara. Here’s a step-by-step guide:
- Isolate the section of hair you want to create coontails on.
- Apply white mascara to bleach the section, allowing it to dry.
- Create black streaks with black mascara, letting it dry as well.
- Comb the area gently to soften the coontails.
- Repeat steps 2-4 for a more defined look.
You can also use different colors instead of black or create multi-colored coontails by using more colors. Remember to use a clean mascara wand for each color and allow the mascara to dry before combing. Use a fine-toothed comb for precision and experiment with different mascaras for various effects.
Mascara Application Instructions
To create coontails with mascara, first isolate the hair section you want to style. For light hair, apply white mascara as an optional base. Next, use a fine-toothed comb to create black streaks with black mascara. Comb gently to define the coontail pattern. Repeat for desired definition.
Use clean mascara wands for each color and allow mascara to dry before combing. Experiment with different mascaras for unique effects. This method offers temporary styling options and is suitable for all hair colors and textures.
Variations and Tips
After mastering the basics, why not jazz things up? Swap your painter’s tape for a kaleidoscope of colors, turning coons into raccoons with multi-colored coontails.
Ditch traditional hair dyeing techniques for a mascara wand; it’s not just for lashes anymore. Remember, a clean wand guarantees a sleek look.
Towel dry hair, then plunge into the latest hair accessory trends with flair.
Raccoon Tail Hair Color Inspirations
Discover the endless possibilities of coontails with these color inspirations: classic black and grey, blonde and brown combinations, and vibrant rainbow coontails. Choose your favorite or mix them up for a unique look.
Classic Black and Grey
To achieve the classic black and grey coontail look, follow these steps:
- Tape Application: Apply tape around the hair strands you want to bleach or dye.
- Bleach Timing: Bleach the strands for the recommended time to achieve the desired shade of grey.
- Dye Choice: Once the bleach is rinsed out, apply black hair dye to the gaps between the tape.
- Hair Damage: Be cautious not to leave the dye on for too long to avoid damaging your hair.
Remember to remove the tape carefully after the dyeing process to prevent damage to your hair. Enjoy your stunning black and grey coontails!
Blonde and Brown Combinations
Blonde and brown combinations offer a stunning contrast that can elevate your coontail game. To achieve this look, start by bleaching your hair to a light blonde base. Then, apply brown dye to create the contrasting highlights. Use a fine-toothed comb to guarantee precision and even distribution of the dye. Remember to follow the instructions on the hair dye packaging for best results.
Vibrant Rainbow Coontails
To create vibrant rainbow coontails, start by choosing a rainbow color scheme inspired by the color wheel. Color block your hair with each hue, creating a gradient effect that changes smoothly from one shade to the next. You can also add hair extensions for extra length and volume.
To achieve the gradient effect, apply the dye in a zigzag pattern, starting with the lightest color at the roots and gradually fading into the darker shades towards the ends.
Once dried, style your coontails with a fine-toothed comb for a polished finish.
Maintaining Your Coontail Style
Keeping your coontails vibrant is like tending a garden; it requires regular care and the right tools. Start with the basics: shampoo selection and conditioner choice are your watering can and fertilizer, ensuring your hair’s health and shine.
Don’t let your colors fade into the background; schedule dye touch-ups like you’d mark your calendar for a seasonal planting. Between salon visits, explore home remedies to keep those stripes as sharp as a tiger’s.
Frequently Asked Questions (FAQs)
Can I use a different color for the coontail pattern other than black?
Absolutely, you can jazz up your coontail pattern with any color under the sun! Whether it’s rainbow hues or pastel shades, the sky’s the limit when personalizing your hair masterpiece.
How long does it take for the coontail dye to dry before I can remove the tape?
The drying time for coontail dye before removing the tape varies depending on the specific hair dye used. As a general guideline, it’s recommended to wait at least 30 minutes after applying the dye before removing the tape. This allows the dye to fully absorb into the hair and prevents the tape from pulling off excess dye, which could result in uneven color or staining.
Always follow the instructions provided by the hair dye manufacturer for the most accurate information.
Can I use a different type of tape for the stencil, like duct tape?
You can use duct tape for the stencil, but it’s recommended to use Scotch tape or painter’s tape for creating coontails.
Can I use a different type of mascara for the coontail pattern, like a gel or liquid mascara?
Absolutely, you can swap out traditional mascara for a gel or liquid mascara to create those coontail patterns. They’ll glide on smoother, giving you more control for that perfect, stripey masterpiece you’re aiming for.
Can I create coontails on short hair extensions?
To create coontails on short hair extensions, you can follow these steps:
- Choose light-colored synthetic clip-in extensions.
- Lay the extension flat on a surface, such as paper or a table.
- Apply regular white masking tape or painter’s tape to create even stripes down the length of the extension.
- Color in the exposed parts of the extension using a chisel tip Sharpie, starting from the middle and working out to the edges of the tape.
- Let the marker dry completely.
- Carefully remove the tape, being careful not to smudge the marker.
- Brush the extension to soften the marker and create a coontail effect.
Remember to avoid using hair dye on synthetic hair, as it can melt the hair off. Instead, use a permanent marker or a chisel tip Sharpie for the coontail pattern.
Conclusion
Unleash your inner raccoon with these easy-to-follow steps for creating stunning coontails. From selecting and preparing your hair strands to applying dye and mascara, you’ll be the envy of all your friends. Don’t forget to explore color inspirations and maintain your coontail style. So, what’re you waiting for? Get started today and let your coontail dreams come true!
