This site is supported by our readers. We may earn a commission, at no cost to you, if you purchase through links.
 Ready to liberate your hair from the stubborn grip of shea butter? Look no further! In this article, you’ll discover effective techniques and DIY recipes for removing shea butter from your beautiful locks.
Say goodbye to sticky residue and hello to free-flowing strands. From pre-treatment with oil to using clarifying shampoo, we’ve got you covered with expert tips and tricks for a successful removal process.
Table Of Contents
- Key Takeaways
- Why is Shea Butter Difficult to Remove?
- Common Challenges in Removing Shea Butter
- Effective Techniques for Removing Shea Butter
- Pro Tips for Removing Shea Butter From Hair
- DIY Recipes for Shea Butter Removal
- Best Practices for Preventing Shea Butter Buildup
- Alternative Hair Products for Shea Butter Removal
- Frequently Asked Questions (FAQs)
- What ingredients interact poorly with shea butter, making removal more difficult?
- Does hair type or texture impact the efficacy of various shea butter removal techniques?
- Can I use baking soda or apple cider vinegar to remove shea butter buildup?
- How long should I wait between shea butter treatments for my hair?
- Are there any medical conditions that would preclude using certain DIY shea butter removal recipes?
- Conclusion
Key Takeaways
- Properties of shea butter include high oil content, solid consistency at room temperature, lack of solubility in water, rich moisturizing benefits, and clinginess causing sticky residue.
- Factors impacting the removal of shea butter include its lack of solubility in water, challenges with traditional cleaning methods, the use of ingredients like hydrogenated castor oil, the impact of humidity on removal effectiveness, and common challenges like sticky residue and incomplete rinsing.
- Effective techniques for removing shea butter from hair include pre-treatment with oils like coconut or olive, the use of clarifying shampoo, conditioning for a final rinse, applying heat for better removal, and using a wide-toothed comb for even distribution.
- Alternative products and cleansing techniques for removing shea butter include sulfate-free shampoos, clarifying shampoos for specialized cleansing, co-washing with conditioner, considering ingredient compatibility for preserving shea butter benefits, and balancing cleansing and preservation for residue elimination.
Why is Shea Butter Difficult to Remove?
Shea butter is difficult to remove from hair due to its composition and lack of solubility in water. Unlike other oils, shea butter doesn’t dissolve easily when exposed to water, making it challenging to wash out completely.
This can lead to a buildup of residue over time if not properly removed, requiring specific techniques and products for effective cleansing.
Shea Butter’s Composition
Shea butter’s composition is what makes it difficult to remove. Here are four key factors that contribute to its challenging removal:
- High oil content: Shea butter contains a high concentration of natural oils, which makes it resistant to water-based cleansing methods.
- Solid consistency: Due to its solid form at room temperature, shea butter can leave behind a sticky residue on the skin or hair.
- Lack of solubility in water: Shea butter doesn’t dissolve easily in water, making rinsing out the residue more challenging.
- Rich moisturizing benefits: The emollient properties of shea butter make it highly effective for moisturizing and nourishing the skin and hair but also contribute to its difficulty in removal.
Understanding these aspects of shea butter’s composition will help you navigate effective techniques for removing it from your hair or skin properly.
Lack of Solubility in Water
Why is shea butter difficult to remove from hair?
The lack of solubility in water presents challenges when trying to remove this waterless shea product.
Due to its oily residue, traditional methods like using soap and water may not be effective.
However, DIY solutions can help overcome these solubility challenges.
For instance, incorporating ingredients such as hydrogenated castor oil into homemade recipes can aid in the removal process.
Additionally, humidity levels can impact the effectiveness of removing shea butter from hair strands.
Common Challenges in Removing Shea Butter
When it comes to removing shea butter from your hair, you may encounter some common challenges.
One of the main issues is the sticky residue that can be left behind after application, making it difficult to completely rinse out. This stickiness can also make it harder for other products or styling tools to adhere properly.
Sticky Residue
To effectively remove the sticky residue left by shea butter, you’ll need to address the common challenge of its clinginess.
Shea butter’s ability to deeply moisturize hair stems from its composition and high oil content. However, this also makes it attract humidity, cling to hair strands, and leave a sticky, hard-to-remove residue.
Carefully incorporating emulsifiers when making DIY shea butter hair products can help offset the sticky residue.
Apply shea butter only to the ends of hair to limit residue.
Difficulty in Rinsing Out Completely
Because shea butter lacks solubility in water, you’ll likely struggle to rinse it out of your hair completely after application.
- Moisture lock, causing limp, greasy hair.
- Residue buildup over repeated use.
- Need for removal innovations like apple cider vinegar.
- Potential environmental impacts if rinsed down the drain.
- Motivation for DIY experimentation with baking soda mixes.
Effective Techniques for Removing Shea Butter
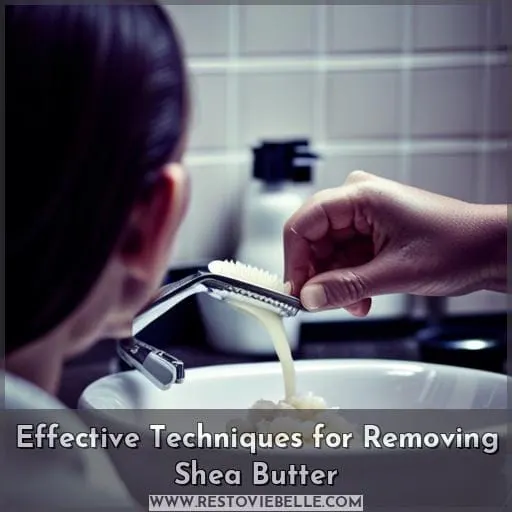
To effectively remove shea butter from your hair, there are several techniques you can try.
One method is to pre-treat your hair with oil before shampooing, as this can help loosen the butter and make it easier to remove.
Another technique is to use a clarifying shampoo, which is specifically designed to deep clean the hair and remove buildup.
Lastly, conditioning your hair for a final rinse can help ensure that all traces of shea butter are removed and leave your strands feeling soft and silky.
Pre-Treatment With Oil
Effective Techniques & DIY Recipes’:
Curious about how to effectively remove shea butter from your hair?
Begin by massaging oils like coconut or olive into your strands before washing. The oils help loosen the thick butter so it rinses out more easily.
Then wash with a clarifying shampoo and conditioner to lift residue.
Regularly applying preventive measures keeps buildup at bay.
Using Clarifying Shampoo
By using a clarifying shampoo, you’re efficiently removing Shea butter buildup from your hair.
Clarifying shampoos are specially formulated to deeply cleanse the hair and scalp, effectively breaking down and removing stubborn product residues like Shea butter.
When choosing a clarifying shampoo, consider product comparisons, ingredient compatibility with your hair type and scalp health, as well as user experiences.
Regular use of a clarifying shampoo can help maintain clean and healthy-looking hair while preventing dryness or irritation caused by excessive Shea butter buildup.
Conditioning for Final Rinse
To ensure complete removal of shea butter from your hair, it’s important to use a nourishing conditioner for the final rinse.
- Deeply hydrates strands
- Seals in natural oils
- Prevents future buildup
Employ a wide-tooth comb while conditioning to evenly distribute the formula. Rinsing with cool water seals the hair cuticle for sleek, smooth results.
Pro Tips for Removing Shea Butter From Hair
To effectively remove shea butter from your hair, there are a few pro tips that can make the process easier.
First, applying heat to your hair before shampooing can help soften and loosen the butter for better removal.
Additionally, using a wide-toothed comb while rinsing out the shampoo can help distribute it evenly and aid in detangling any remaining residue.
Lastly, limiting your usage of shea butter in future applications can prevent excessive buildup and make removal less challenging overall.
Applying Heat for Better Removal
Are you wondering how to improve the removal of shea butter from your hair? Applying heat is a pro tip for better removal.
Heat application helps soften the hair and increase its porosity, making it easier to remove residue.
You can try using DIY heat packs or thermal removal methods to apply heat directly to the affected areas.
This technique, combined with other effective techniques like pre-treatment with oil and clarifying shampoo, can help you successfully remove shea butter from your hair.
Using a Wide-Toothed Comb
You’ll find a wide-toothed comb helps loosen and remove stubborn shea butter residue from hair strands.
- Start by detangling your hair with the wide-toothed comb.
- Use gentle, downward strokes to avoid breakage.
- Comb through small sections of hair to ensure thorough removal.
- Spread the shea butter evenly throughout your strands for easier combing.
- Wipe off any excess shea butter on the comb after each stroke.
Limiting Shea Butter Usage
To minimize the challenges of removing shea butter from your hair, it is recommended to limit the amount of shea butter you use.
By using a smaller quantity, you can reduce the buildup and make it easier to remove.
Additionally, exploring alternate applications such as creams or lotions with lower amounts of shea butter can provide skin-friendly approaches for hydration.
Adapting to different weather conditions and considering natural moisturizers are also effective strategies for limiting shea butter usage.
| Tips for Limiting Shea Butter Usage | Benefits |
|---|---|
| Use a smaller quantity | Reduces buildup |
| Explore alternate applications | Skin-friendly approaches |
| Adapt to different weather conditions | Adjusts effectiveness |
DIY Recipes for Shea Butter Removal
If you’re looking to remove shea butter from your hair, there are a couple of DIY recipes that can help.
One option is to create a baking soda and water paste by mixing equal parts of both ingredients until it forms a thick consistency.
Another method is using an apple cider vinegar rinse by diluting 1 part apple cider vinegar with 3 parts water and pouring it over your hair after shampooing.
Baking Soda and Water Paste
Effective Techniques & DIY Recipes’:
To effectively remove shea butter from your hair, try making a baking soda and water paste.
- Helps lift and dissolve shea butter buildup
- Restores hair’s pH balance
- Mix 1 tbsp baking soda with water to form paste
- Gently massage into hair and rinse after 5 minutes
Apple Cider Vinegar Rinse
How can you effectively remove shea butter residue from your hair using a DIY apple cider vinegar rinse?
Apple cider vinegar is known for its clarifying properties and can help eliminate buildup on the scalp.
To make an apple cider vinegar rinse, mix one part apple cider vinegar with three parts water.
After shampooing, pour the mixture over your hair and massage it into your scalp.
Follow up with conditioner to restore moisture to your strands.
| Apple Cider Vinegar Rinse |
|---|
| Ingredients: |
| – 1 part apple cider vinegar |
| – 3 parts water |
Best Practices for Preventing Shea Butter Buildup
To prevent shea butter buildup in your hair, it’s essential to follow proper application techniques.
- Use less shea butter during each application to avoid excessive residue.
- Additionally, establish a regular cleansing routine to remove any buildup and maintain clean and healthy hair.
Proper Application Techniques
Are you wondering how to properly apply shea butter to prevent buildup and maximize its benefits for your hair?
Proper application techniques are essential in ensuring that shea butter is effectively absorbed by the hair without leaving residue or causing greasiness. Consider your climate, as humidity can affect the texture of shea butter. Experiment with different ingredient combinations and find a balance between moisturization and preventing excessive stickiness.
Whether using DIY recipes or commercial products, following these tips will help you achieve optimal results for your hair styling needs.
Using Less Shea Butter
After applying shea butter properly, limit your usage of it moving forward to prevent buildup in your hair over time.
Consider your climate and humidity levels when deciding how much shea butter to use.
Also factor in your hair and scalp’s compatibility with shea butter. Using proper emulsifiers can help combat buildup from excess shea butter application.
Alternatively, try formulas with a higher percentage of nourishing oils over shea butter.
Regular Cleansing Routine
To prevent Shea butter buildup, incorporate a regular cleansing routine into your hair care regimen. This will ensure that your scalp and hair remain clean and free from excessive product residue.
Here are four best practices for preventing Shea butter buildup:
- Choose products with skin-compatible ingredients to avoid ingredient interactions.
- Adjust your cleansing routine based on climate variations and cultural practices.
- Use water-based skincare products to maintain hydration without weighing down the hair.
- Incorporate castor oil treatments into your routine for enhanced hair growth and nourishment.
By following these steps, you can effectively prevent Shea butter buildup while promoting healthy, curly hair growth.
Alternative Hair Products for Shea Butter Removal
When it comes to removing shea butter from your hair, there are alternative hair products that can help.
- Sulfate-free shampoos are a popular choice as they effectively cleanse without stripping the hair of moisture.
- Clarifying shampoos can also be used occasionally to deeply cleanse and remove any buildup.
- Another option is co-washing with conditioner, which helps to gently remove excess shea butter while providing hydration and nourishment to the hair.
Sulfate-Free Shampoos
When removing Shea butter from your hair, opt for sulfate-free shampoos.
They’re gentle cleansers that preserve Shea butter’s anti-inflammatory properties while controlling humidity and maintaining pH balance for ingredient compatibility.
Consider your skin’s sensitivity and seek commercial options focused on preservation over harsh removal.
Balance simplicity with thorough cleansing for residue elimination without irritation.
Clarifying Shampoos
Effective Techniques & DIY Recipes:
Having tried sulfate-free shampoos, consider clarifying shampoos to remove stubborn shea butter buildup from your hair. Clarifying shampoos offer specialized formulations to penetrate residue while balancing pH levels for scalp health.
However, these shampoos can dry hair over time, so alternate use with moisturizing products.
Co-Washing With Conditioner
Try co-washing with conditioner as an alternative method for removing Shea butter from your hair.
Co-washing, or using conditioner to cleanse your hair, offers several benefits in addition to effectively removing Shea butter residue.
Conditioners provide moisturizing effects and help maintain hair hydration while gently cleansing the scalp.
To maximize the conditioning and cleansing effects of co-washing with conditioner, make sure to thoroughly massage it into your scalp and rinse well afterwards.
Experiment with different conditioning methods that work best for you, considering ingredients like cocoa butter, mango butter, or vegan butters in conditioners specifically designed for co-washing purposes.
Frequently Asked Questions (FAQs)
What ingredients interact poorly with shea butter, making removal more difficult?
Certain ingredients, such as water, don’t interact well with shea butter and can make its removal from hair more difficult.
It’s important to use effective cleansing agents like shampoo or conditioner for optimal results.
Does hair type or texture impact the efficacy of various shea butter removal techniques?
The efficacy of various shea butter removal techniques can be impacted by hair type or texture. Experimentation with different methods, such as massaging castor oil and shampooing on wet hair, may yield the best results for your specific hair characteristics.
Can I use baking soda or apple cider vinegar to remove shea butter buildup?
You can try using baking soda or apple cider vinegar to help remove shea butter buildup.
Gently massage a mix of baking soda and water or diluted ACV into your hair before shampooing as usual. The acidity helps break down oils and lift residue. Proceed cautiously as overuse risks damage.
How long should I wait between shea butter treatments for my hair?
To ensure optimal results, it is recommended to wait at least 2-3 days between shea butter treatments for your hair. This allows time for the previous application to be fully absorbed and avoids excessive buildup.
Are there any medical conditions that would preclude using certain DIY shea butter removal recipes?
Certain medical conditions may preclude the use of specific DIY shea butter removal recipes.
It’s recommended to consult with a healthcare professional before attempting any new hair care methods, especially if you have underlying health concerns.
Conclusion
As you’ve seen, shea butter can certainly pose some styling challenges, but with the right techniques and products you can successfully remove it from your hair. Investigating the compositions behind its stubborn grip equips us to combat residue.
By pre-treating with oils, using clarifying shampoos, and conditioning for that final rinse, you’ll be well on your way to free-flowing, butter-free strands. Employ these removal methods regularly alongside smart preventative practices, and you’ll reclaim control over your beautiful locks.

