This site is supported by our readers. We may earn a commission, at no cost to you, if you purchase through links.
 Shaving with a knife? Whoa there, cowboy! It’s definitely not your average morning routine.
First, you’ll need an extremely sharp, non-serrated knife – think razor sharp.
Then, lather up generously; you want a slick surface to glide across.
Hold your skin taut and the knife at a shallow angle, using short, gentle strokes.
Remember, control is key; this isn’t a race.
A little pressure goes a long way.
We’re talking about your face, after all.
Small, precise movements are your friend here.
While it might seem intimidating, mastering this technique can provide a surprisingly smooth shave.
But we haven’t even touched on the best ways to prepare your blade…
Table Of Contents
- Key Takeaways
- Is Shaving With a Knife Safe?
- How to Shave With a Knife
- Choosing The Right Knife for Shaving
- Preparing Your Knife for Shaving
- Shaving Technique and Best Practices
- Pre- and Post-Shave Care for Smooth Skin
- Maintaining Your Shaving Knife for Optimal Performance
- Frequently Asked Questions (FAQs)
- How do you shave with a knife?
- How to choose a good shaving knife?
- How do you maintain a shaving knife?
- Can You shave your face with a sharp knife?
- Should you shave with a knife or a straight razor?
- Can I use a shaving cream instead of a knife?
- Is it okay to shave with a knife?
- How do you shave with a shave knife?
- How sharp does a knife have to be to shave?
- How to shave with just blade?
- How do I sharpen a knife safely?
- What are the risks of shaving with a knife?
- Can a kitchen knife be used for shaving?
- How often should I strop the knife?
- What alternatives exist to shaving with knives?
- Conclusion
Key Takeaways
- Use an extremely sharp, non-serrated knife, keeping it at a 30-degree angle to achieve a clean shave without cutting yourself.
- Apply a rich lather using shaving cream or foam to create a protective barrier between the blade and your skin, reducing the risk of irritation.
- Master short, controlled strokes while using alternatives like aloe vera gel to maintain consistent pressure to ensure a smooth and safe shaving experience.
- Regularly sharpen and maintain your knife, using a whetstone and strop, to keep the blade razor-sharp and rust-free for optimal performance.
Is Shaving With a Knife Safe?

You’re probably wondering if shaving with a knife is as risky as it sounds, and honestly, it’s not something you should try unless you’re in a survival situation without other options.
While it’s technically possible to get a clean shave with a properly sharpened knife, you’ll need steady hands and the right technique to avoid turning your morning routine into an emergency room visit.
Risks and Safety Concerns
Shaving with a knife isn’t just risky business – it’s a technique that demands serious respect and expertise.
You’re basically using a tool that wasn’t designed for facial grooming, which brings inherent dangers.
For a safer and more controlled shave, consider investing in a Safety Razor Kit, a specialized tool for grooming.
Without proper knowledge and steady hands, you’re putting your skin at risk.
While survivalists might swear by it, there are safer alternatives like razors and clippers that’ll give you a cleaner, more controlled shave.
Cuts and Injuries
When it comes down to shaving with a knife, you’re dealing with serious injury risks.
Without proper precautions, you could face deep cuts, severe bleeding, and potential scarring.
Even minor nicks can lead to infections or razor burn that’ll have you regretting your decision.
First aid knowledge is essential – keep antiseptic and bandages nearby, because one wrong move could turn your grooming session into an emergency room visit.
Importance of Proper Technique
With proper technique, you’ll transform a potentially risky situation into a controlled grooming session.
Mastering blade control and consistent strokes isn’t just about getting a clean shave – it’s about keeping your skin intact.
You’ll need to maintain gentle pressure while keeping your skin taut, and master the correct angle (around 30 degrees) to slice through hair without nicking yourself.
How to Shave With a Knife
Before you tackle shaving with a knife, let’s get something straight – this isn’t your typical morning routine.
Think of it as an advanced grooming skill that requires patience, precision, and a steady hand.
Start by soaking your face with warm water to soften those stubborn whiskers.
For a more precise shave, consider using the single-blade technique, similar to how double-edged blades in safety razors provide a sharp and efficient shave.
Here’s what you need to know about the basic technique:
- Hold the blade at a 30-degree angle against your skin – too steep and you’ll cut yourself, too shallow and you’ll just irritate your face
- Use short, controlled strokes while keeping your skin taut with your free hand
- Always shave in the direction your hair grows, taking extra care around your jawline and neck
Don’t rush this process.
Imagine you’re conducting a delicate orchestra rather than hacking through a jungle.
Take your time, and remember – slow and steady wins this race.
Choosing The Right Knife for Shaving
You’ll want to pick a knife that’s sharp enough to slice through hair without pulling, and while any non-serrated blade can work in a pinch, your best bet is one with a fine edge similar to a straight razor.
If you’re stuck using a regular knife for shaving, you can improve your results by carefully sharpening it to about a 10-degree angle, which will help you get that close, clean shave you’re after.
Type of Knife

Selecting the right knife can make or break your emergency shaving experience.
While straight razors are ideal, you can use various knives in a pinch – from kitchen knives to pocket knives.
The key is choosing one with a solid handle design and comfortable weight.
Skip serrated blades entirely – they’ll tear up your face.
When choosing a knife for shaving in an emergency, consider a blade with a thickness and width similar to those found in high-quality straight razor options. Look for a knife with a smooth, single-edge blade that resembles a straight razor’s design.
Blade Sharpness and Angle

A razor-sharp blade makes the difference between a smooth shave and a painful ordeal.
You’ll want to achieve the perfect balance of sharpness and angle for safe, effective shaving.
Here’s what you need to know:
- Aim for a blade angle of 30 degrees when shaving
- Sharpen your knife to below 10 degrees for the best cutting
- Test sharpness by trying to slice a hanging hair
- Maintain consistent pressure throughout your strokes
- Check edge alignment by examining blade reflection
Materials and Edge Quality

The quality of your knife’s steel makes the difference between a smooth shave and a painful hack job.
Carbon steel blades, like those used in straight razors, hold their edge longer than stainless steel but require more maintenance.
For a more convenient option, consider shopping for high-carbon stainless razors online at High Carbon Razors.
Your best bet? Look for high-carbon stainless steel – it’s the sweet spot between durability and edge retention.
Just remember, even the finest steel needs proper care.
Avoiding Serrated Blades

Serrated blades are your worst nightmare for shaving – they’ll tear at your skin like a cheese grater.
You’ll want to stick with straight-edge blades that can deliver clean, precise cuts.
While survival knives often come with serrated sections, avoid using these parts for shaving.
The jagged teeth will catch and pull your hair, leading to painful cuts and uneven results.
Preparing Your Knife for Shaving

You’ll need the right tools and technique to turn your ordinary knife into a makeshift razor that won’t leave your face looking like it lost a fight with a cheese grater.
Getting your blade razor-sharp isn’t rocket science, but it does require careful attention to detail and the right sharpening approach to achieve that perfect edge for a safe, comfortable shave.
Sharpening Techniques
Once you’ve picked your knife, sharpening it’s like tuning a guitar – it’s all about precision.
Start with a quality whetstone (1000/6000 grit works well), similar to the stones used for sharpening a straight razor, where a 1,000 grit stone is typically used to set the bevel.
Hold the blade at a 10-degree angle, and use smooth, consistent strokes from heel to tip.
Don’t rush – alternate sides every few strokes.
Feel for a burr forming along the edge, then switch to the finer grit for polishing.
Importance of Razor-Sharp Edge
Getting your knife razor-sharp isn’t just about aesthetics – it’s absolutely essential for your safety and comfort.
A dull blade will tug at your facial hair, causing irritation and potential cuts.
Think of it like this: you wouldn’t try to cut a tomato with a butter knife, right?
The same principle applies to your face.
Your blade needs to slice through hair effortlessly, not saw through it.
Using a Double-Sided Whetstone
A double-sided whetstone gives you complete control over your blade’s edge.
With coarse (1000 grit) and fine (6000 grit) sides, you’ll transform any dull knife into a precision tool.
- Your heart races as steel meets stone
- Each stroke brings you closer to razor-sharp perfection
- The gentle splash of water reminds you to take it slow
- That satisfying ‘swish’ means you’re doing it right
Focus on maintaining consistent angles and pressure while working through both grits.
Seeking Professional Sharpening Services
If you’re not confident with whetstones, professional sharpening services can be your best friend.
Local knife shops, specialty cutlers, and even some hardware stores offer expert sharpening using industrial-grade equipment.
While costs typically range from $10-30 per blade, the investment pays off with a properly sharpened edge that’s safer for shaving.
Just remember to mention you’ll be using it for personal grooming.
Shaving Technique and Best Practices
You’ll need more than just a sharp knife to get that smooth, nick-free shave you’re hoping for in a pinch.
When you’re ready to transform your survival blade into an emergency razor, these proven techniques will help you avoid looking like you’ve just wrestled with an angry cat.
Applying Shaving Cream or Foam

The secret to a smooth shave lies in creating a rich, protective lather.
Apply warm water to your face, then work your favorite shaving cream or foam into a thick, creamy consistency.
For the best results, to create a rich, warm lather that transforms shaving into a pampering ritual, use a ceramic shaving bowls. Use a high-quality shaving brush to whip up a luxurious lather in circular motions.
This creates a cushioning barrier that’ll help prevent nicks and irritation while softening your facial hair.
Holding The Knife Correctly

You’ve got your shaving cream on, now hold the knife right. Picture the grip like a firm handshake, keeping a steady pressure. For an even closer and more comfortable shave, consider a dedicated tool like a straight razor blade.
- Grip: Keep it secure without being a knuckle-white squeeze.
- Stability: Hold your hand steady like you’re painting.
- Technique: Imagine handling a straight razor—focus on control and confidence.
These basics prep you for safe knife shaving.
Shaving Angle and Motion

When mastering the art of using a knife for shaving, keep the angle around 30 degrees.
This helps the blade glide smoothly over your skin without nicks.
Hold the knife steady, applying just enough pressure—not too much—to avoid irritation.
Follow the grain of your hair with gentle and confident strokes for a comfortable shaving experience.
Maintaining a Consistent Angle

Maintaining a consistent angle while shaving with a knife is like dancing on a tightrope; get it wrong, and you might slip.
Practicing this art involves steady hands and understanding angle impact.
To master this, start with short, controlled shaving strokes and pay attention to blade control.
Avoid angle errors by keeping skin tension steady, ensuring razor sharpness and comfort.
Avoiding Excessive Pressure

Imagine this: you’re wielding your knife with a sculptor’s precision.
Here’s the trick—lighten up on the shaving pressure.
Too much force and you’re inviting razor burn or ingrown hairs.
Instead, let the blade glide gracefully.
Think of it as a dance, with gentle shaving strokes and a comfortable grip.
This way, you sidestep skin irritation while mastering your craft.
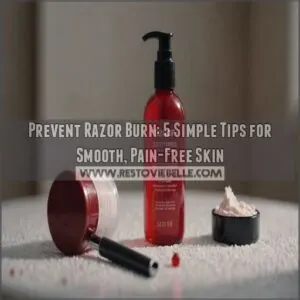
Pre- and Post-Shave Care for Smooth Skin

For the ultimate shaving experience, using the right prep and follow-up techniques is key, whether you’re wielding a knife or a razor.
You wouldn’t want your face feeling like sandpaper, so start with a nourishing lather using a shaving brush.
After shaving, don’t skip the cold compress and moisturizer to keep your skin feeling as smooth as it looks.
Using a Shaving Brush and Soap
You’ve got your knife ready; now, lather up like a pro.
Grab a shaving brush—boar, badger, or synthetic—and whip up that shaving soap into a creamy masterpiece.
Use brisk, circular motions to spread luxurious foam evenly across your face.
This practice in wet shaving not only amps up lather quality but also helps you achieve smooth strokes with your straight razor.
Creating a Protective Barrier
After lathering up with your shaving soap and brush, it’s time to add another layer of protection.
Pre-shave oil acts like a tiny superhero for your skin, creating a slick barrier between your blade and your face.
This helps prevent razor burn and keeps things smooth.
Think of it as a secret weapon against irritation.
A little oil goes a long way toward a comfortable shave.
Applying a Cold Compress
You’ve wrapped up your shave, so what’s next? Time to cool things down with a cold compress! Here’s how:
- Grab a clean cloth, soak it in cold water.
- Gently press it against your skin to tighten pores.
- Banish irritation and soothe redness.
- Feel refreshed, just as cooling as an icy drink on a hot day!
Using a High-Quality Moisturizer
When shaving with a knife, applying a gentle pre-shave preparation like soothing shaving cream can help minimize irritation. A little moisturizer goes a long way in soothing sensitive skin after a knife shave.
Skin-loving ingredients like aloe or shea butter help lock in hydration and ease any leftover irritation from your grooming adventure.
Think of it as a calming aftershave spa for your face, keeping it smooth and happy.
Maintaining Your Shaving Knife for Optimal Performance

To keep your shaving knife in top shape, you’ll need to master basic stropping and honing techniques, otherwise, you might end up with a butter knife instead of a blade!
Remember to store and clean it properly—no one wants an unexpected tetanus shot just because you forgot to dry the blade.
Stropping and Honing Techniques
Stropping and honing are your best pals for keeping your shaving knife sharp. Follow these steps:
- Stropping frequency matters: Do it after each shave. This keeps a keen edge.
- Honing materials: Use fine grit stones to refine the blade.
- Remember, a well-maintained blade can last longer, just like a sharp safety razor blade, doesn’t require flipping to extend its life.
- Leather strop care: Keep it clean and supple.
- DIY stropping tips: Practice makes perfect with simple motions.
Proper Storage and Maintenance
Once your knife is sharp, don’t forget about proper storage and maintenance.
Keep your blade rust-free by storing it in a dry environment; moisture’s the enemy here.
Use a razor case for added protection.
Regularly hone and strop your straight razor to make sure it keeps performing at its best.
Your sharpening schedule is key to razor maintenance mastery.
Regularly Cleaning The Blade
Proper storage? Check.
Now, let’s chat about blade hygiene to keep your knife in top shape.
Use gentle cleaning tools and disinfecting methods to banish grime and germs.
Think of it like a mini spa day for your blade!
Rust prevention is essential for blade longevity, so dry it well.
A well-kept knife equals a trusty shaving companion.
Frequently Asked Questions (FAQs)
How do you shave with a knife?
Shaving with a knife isn’t everyone’s cup of tea, but if you’re adventurous, start by sharpening your knife to razor level.
Apply shaving cream, hold the blade at 30 degrees, and shave gently.
Handle with caution!
How to choose a good shaving knife?
Look for a knife with a razor-sharp edge, around 10° angle, similar to a straight razor.
Avoid serrated blades.
Choose high-quality steel for durability.
Consider professional sharpening if you’re unsure about honing it yourself.
How do you maintain a shaving knife?
Keep your shaving knife sharp by regularly honing and stropping it.
Clean and dry it after each use to prevent rust.
Store it in a dry place, and never skip the leather strop for that razor-sharp edge.
Can You shave your face with a sharp knife?
You can shave your face with a sharp knife, but it’s risky.
Without experience, you could cut yourself.
It’s best to stick with razors designed for shaving to avoid accidents and achieve a cleaner, safer shave.
Should you shave with a knife or a straight razor?
When it comes to emergency grooming, using a straight razor can be a better option than a knife, especially if you have some experience with shaving technique guides. Choosing between a knife and a straight razor comes down to skill and safety.
Straight razors are safer and designed for shaving, offering precision and ease of use.
Knives demand expert handling to avoid injury.
Can I use a shaving cream instead of a knife?
Shaving cream’s a must, not a maybe! It’s your secret weapon for a smooth, irritation-free shave. Skip the cream, and you’re asking for trouble—nicks, cuts, the whole shebang.
Is it okay to shave with a knife?
Picture yourself trying to tame a wild river with only a leaf; shaving with a knife is similar.
It’s risky, best left to experts.
Stick with razors for a smooth, safe shave and peace of mind.
How do you shave with a shave knife?
Grab your knife securely, aiming for a smooth, steady hand.
Start with the blade at a 30-degree angle.
Use slow, gentle strokes after applying shaving cream.
Finish with a moisturizing aftercare routine to soothe your skin.
How sharp does a knife have to be to shave?
Think of a knife sharp enough to slice through life’s toughest challenges.
To shave, it should be razor-sharp, honed at about a 10-degree angle, allowing it to glide smoothly without nicking your skin.
How to shave with just blade?
Use a sharp blade, ensuring it’s like a samurai sword ready for battle.
Apply shaving cream.
Keep the blade at a 30-degree angle, and slide gently along your skin.
Don’t rush; slow and steady wins the race.
How do I sharpen a knife safely?
Start by holding the knife at a 20-degree angle against a whetstone.
Slide it across the stone in smooth, even strokes.
Rotate sides frequently, using lighter pressure as the blade sharpens.
Patience and practice are key!
What are the risks of shaving with a knife?
Don’t push your luck by shaving with a knife; it’s risky.
You face cuts, nicks, and potential infections without proper skill.
Without the precision of razors, a knife increases your chances of injuries, especially on uneven skin surfaces.
Can a kitchen knife be used for shaving?
Technically, yes, but it’s incredibly dangerous. Seriously, don’t. A razor or electric shaver is way safer and easier. Trust me on this one.
How often should I strop the knife?
Picture honing a blade to a whisper of sharpness.
Strop your knife after each shaving session to maintain its edge.
Regular stropping hones accuracy and provides a smoother shave, keeping that edge sharp and ready for action.
What alternatives exist to shaving with knives?
Using a safety razor can be more efficient, especially when shaving your head, with options like the Gillette SkinGuard Razor Flex Handle 4 Blades designed for sensitive skin care. Try using a safety razor or an electric shaver instead of a knife.
They offer precision and ease of use.
Alternatively, waxing or laser hair removal are long-term solutions for smooth skin without the risk of cuts.
Conclusion
You might be surprised to learn that mastering how to shave with a knife might just save your day when you’re out camping or in an unexpected situation.
By choosing the right knife, prepping it properly, and using the correct technique, you can achieve a smooth shave even without traditional tools.
Remember to maintain your knife for future use, and take proper care of your skin before and after shaving.
This unique skill isn’t just about grooming; it’s about readiness and resourcefulness.
Happy shaving!