This site is supported by our readers. We may earn a commission, at no cost to you, if you purchase through links.
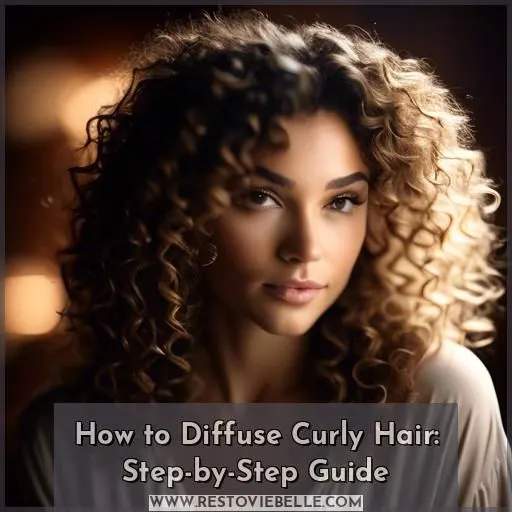
To diffuse curly hair, start by gently blotting out excess water with a microfiber towel or cotton T-shirt. Apply a leave-in conditioner to moisturize and detangle.
Section your hair and use a diffuser attachment with prongs to lift roots and build volume. Hold each section in the diffuser bowl for 30 seconds, moving around your head for even heat distribution.
Protect your hair with a heat protection spray and continue until it’s completely dry. Finish by massaging your scalp, raking fingers through curls, and applying hair oil for definition.
This method enhances curls and adds body, and with a bit of experimentation, you’ll discover even more ways to perfect your look.
Table Of Contents
- Key Takeaways
- How to Diffuse Curly Hair?
- Prep Your Hair
- Dry in Sections
- Build Volume
- Keep Going
- Shake and Go
- Fluff Roots With Fingers
- Scrunch With Hair Oil
- Shake Your Head Gently to Release Curls
- Use a Diffuser With Extendable Prongs for Root Lifting
- Enhances Curl Definition and Body
- Distributes Heat Evenly
- Prevents Heat Damage
- Reduces Frizz
- Adds Volume
- Defines Curls
- Air-dry Hair 50-60%
- Flip Head Upside Down
- Use Medium-low Heat
- Start at the Crown of the Head
- Massage Scalp and Roots With Diffuser Prongs
- Wait 30 Minutes Before Diffusing
- Wrap Hair in a Cotton T-shirt to Absorb Water
- Use the Cool Shot Button to Eliminate Frizz
- Apply Sweet Almond Oil to Scrunch Out Crunch
- Stretch Hair Using the Tension Method
- Air-dried Hair is Flat
- Diffused Hair Has Volume and Tighter Curls
- Depends on Personal Preference
- Experiment With Diffusing Before Making a Decision
- Diffusing Takes About 20 Minutes
- Stretching Adds 3 Minutes
- Natural Hair Requires Trial and Error
- Frequently Asked Questions (FAQs)
- Conclusion
Key Takeaways
- Gently remove excess water from curls using a microfiber towel or cotton T-shirt to minimize frizz and breakage before applying leave-in conditioner for moisture and even distribution.
- Use a diffuser attachment with prongs to lift roots and build volume, drying hair in sections and ensuring even heat distribution to enhance curls and prevent heat damage.
- Continue the diffusing process until hair is completely dry to lock in curl definition, maintain volume, and keep frizz at bay, using a heat protection spray to safeguard hair.
- Finish by fluffing roots with fingers, scrunching curls with hair oil for added definition and moisture, and employing the cool shot button or a cotton T-shirt to absorb excess oil and reduce frizz.
How to Diffuse Curly Hair?
To diffuse curly hair, follow these steps:
- After showering, pat-dry your hair using a gentle microfiber towel to absorb excess moisture.
- Apply a curly hair product throughout your damp strands using your fingers or a gentle wide-toothed comb.
- Set and enhance your texture by either scrunching your hair using your hands or a diffuser attachment on your blow-dryer.
- Use a diffuser attachment on your blow-dryer, starting with the roots and working your way down.
- Complete one section with the diffuser before moving on to the next.
- Allow for a final 20% of moisture to dry naturally for the smoothest and healthiest looking curls.
Remember to use a low speed and medium heat setting, and avoid touching your hair between wet and dry to prevent frizz.
Prep Your Hair
To prepare your hair for diffusing, begin by gently removing excess water from your curls. Afterward, apply a leave-in conditioner to provide moisture and ensure even distribution. This step is essential for preserving the health and nourishment of your curls.
Remove Excess Water From Curls Gently
To remove excess water from your curls gently, you have a few options. You can use a microfiber towel, which is more absorbent and gentle on your hair than traditional cotton towels. Scrunch your curls with the towel to remove excess water before applying your leave-in conditioner and styler. If you prefer not to use heat, you can also use a microfiber towel to assist with plopping your hair.
Another option is to use a cotton T-shirt. Gently squeeze excess water out of your hair and place your head in the opening of the T-shirt. Press your hair to soak up water, twist and wrap the T-shirt around your head, and leave it covered for 10 to 15 minutes for fine hair or 20 to 25 minutes for thick, curly hair. This method is also less likely to cause frizz and breakage compared to traditional cotton towels.
Additionally, you can use a curl towel, which is designed specifically for curly hair. Scrunch your curls with the towel to remove excess water and help define your curls. This method can be particularly useful if you’re air-drying your hair, as it can help to reduce the drying time and minimize frizz.
Remember to be gentle when removing excess water from your curls, as excessive rubbing can cause frizz and breakage. Instead, use a light touch and scrunch your curls to help them retain their shape and definition.
Apply a Leave-in Conditioner for Moisture and Even Distribution
To get your curly hair ready for diffusing, you must put on a leave-in conditioner to keep it moist and spread it out evenly. Here’s a step-by-step guide:
- Get rid of extra water from your curls gently: Squeeze out extra water from your curls without being too rough, as this can cause frizz.
- Put on a leave-in conditioner: Choose a lightweight, non-greasy leave-in conditioner that’s made just for curly hair. Put an appropriate amount on your damp hair, focusing on the middle and ends.
- Spread it out evenly: Use your fingers or a wide-toothed comb to make sure the conditioner is spread out evenly throughout your curls.
- Scrunch your hair upwards: Scrunch your hair upwards to help your curls form and make them as defined as possible.
Dry in Sections
After preparing your hair, it’s time to dry it in segments. This is an essential step to achieve well-defined, frizz-free curls. Begin by holding each segment in the diffuser bowl for approximately 30 seconds. The key is to handle your hair expertly by cupping it and scrunching the curls.
Remember to treat the diffuser attachment as an extension of your hand, maneuvering it around your head in small segments. While drying, lift your roots to create volume. Keep in mind that the diffuser is your trusty companion in diffusing curly hair, so wield it skillfully.
Build Volume
To build volume and enhance curls, start by using a diffuser attachment with extendable prongs. These prongs will help lift your roots, creating the illusion of fullness. As you diffuse, be sure to hold each section in the diffuser bowl for about 30 seconds, moving around your head in small sections. This will help distribute heat evenly and protect your hair from damage.
To further enhance your curls, consider using a curl elongator or curl definer product. These products can help define your curls and reduce frizz, giving your hair a more polished look. Just be sure to apply these products after diffusing, as they can interfere with the diffusing process if applied before.
Incorporating a heat protection spray into your routine is also important. This will help protect your hair from the heat of the diffuser and prevent damage. Plus, it will help reduce frizz and keep your curls looking their best.
Keep Going
After building up that enviable volume, it’s tempting to call it quits, but hold your horses! The journey to luscious locks isn’t over yet. Continuing the diffusing process until your hair is completely dry is essential. You might think cutting corners on diffusing time will save you from potential hair damage, but patience is a virtue that pays off in the world of curly hair drying.
A fully dried mane guarantees that your curl definition stays locked in, volume at its peak, and frizz at bay. Think of your blow dryer and diffuser as your personal curl enhancers, working tirelessly to perfect your curly hair routine. Remember, half-dried hair is a recipe for a frizz fest, and nobody invited that guest to the party.
So, keep that diffuser going, moving systematically around your head. This isn’t just about drying; it’s about crafting the masterpiece that’s your hair. By fully committing to the diffusing process, you’re not just drying your hair; you’re elevating your entire curly hair routine to a work of art.
Shake and Go
To achieve beautiful, manageable, and tighter curls, use a diffuser attachment. Diffusing is an essential investment for styling curls, as it reduces frizz, adds volume, defines curls, and protects hair from heat damage.
Fluff Roots With Fingers
After patiently diffusing, it’s time to give your roots a boost. Here’s how:
- Gently massage your scalp to stimulate and lift roots.
- Use finger raking for even curl clumps and pattern enhancement.
- Remember, a gentle touch prevents frizz and maintains definition.
Scrunch With Hair Oil
Scrunching with hair oil is the final step in diffusing curly hair. Apply a small amount of hair oil to your curls, focusing on the ends to enhance curl definition, improve moisture retention, and control frizz.
Use a cool shot button or wrap your hair in a cotton T-shirt to absorb excess oil.
Remember to shake your head gently to release curls and fluff roots with your fingers for a healthy shine.
Shake Your Head Gently to Release Curls
Shaking your head gently is an essential step in the diffusing process. This technique, also known as shake and go, helps to release the curls and add volume to your hair. Here’s how to do it:
- After diffusing your curls, gently shake your head from side to side. This will help to loosen any cast that may have formed during the diffusing process.
- Use your fingers to fluff the roots of your hair, encouraging volume and body.
- Apply a small amount of hair oil to your fingers and gently scrunch your curls to enhance shine and definition.
- Shake your head once more to release any remaining cast and to guarantee that your curls are fully defined and bouncy.
Remember to be gentle when shaking your head to avoid causing any damage to your curls. The goal is to release the curls without disrupting their shape or causing frizz.
Use a Diffuser With Extendable Prongs for Root Lifting
To achieve elevated roots and a lively bounce, employ a diffuser equipped with adjustable prongs. The prong length and pliability can be modified to accommodate your hair type, guaranteeing uniform heat dispersion and mitigating heat-related harm.
The compatibility of the attachment is of paramount importance, so verify that it fits securely with your hair dryer. The number of prongs also influences the efficacy of the diffuser, with longer prongs being ideal for thicker hair while shorter prongs suit finer hair.
By utilizing a diffuser with adjustable prongs, you can amplify the volume of your curls and delineate your roots, resulting in a more refined and well-defined appearance.
Enhances Curl Definition and Body
Diffusing curly hair with the right attachment can enhance curl definition and body. Look for diffuser attachments that distribute heat evenly, reduce frizz, and boost volume.
Start by removing excess water from your hair and applying a leave-in conditioner. Dry your hair in sections, building volume as you go.
Finish with a shake and go routine, fluffing your roots with your fingers and scrunching with a hair oil.
Distributes Heat Evenly
Using a diffuser attachment to dry curly hair evenly distributes heat, preventing concentrated heat and uneven drying. This feature is essential for preserving curl definition, minimizing frizz, and shielding hair from heat damage. Here’s a guide to using a diffuser effectively:
- Select a diffuser with extendable prongs to lift hair at the roots.
- Begin diffusing at the top of your head, gradually moving downward.
- Keep the diffuser near your scalp and move it around in small sections.
- Let hair dry to 80% before separating and scrunching out the hold.
Prevents Heat Damage
To avert thermal harm during curly hair diffusion, it’s paramount to select the appropriate heat setting for your hair texture. Heat dispersion should be uniform, and the air current ought to be gentle to preclude hair damage. Commence by applying a heat protectant spray to your hair prior to diffusing.
Subsequently, employ a low to moderate heat setting on your diffuser, concentrating on the roots and scalp for volume. Endeavor to maintain the diffuser in proximity to your scalp and utilize a downward motion. Diffusion should be brief, lasting no more than several minutes, so refrain from excessive duration.
To conclude, complete the drying process with cool air to seal in luster and counteract frizz.
Reduces Frizz
Reducing frizz is a key benefit of diffusing curly hair. By using a diffuser attachment, you can distribute heat evenly and prevent damage. Apply a leave-in conditioner for moisture, then air-dry hair 50-60% before flipping your head upside down and using medium-low heat.
Wrap in a cotton T-shirt to absorb water, and use the cool shot button to eliminate frizz. Apply sweet almond oil to scrunch out crunch, and stretch hair using the tension method for added control.
Adds Volume
Releasing volume in your curls is akin to uncovering a hidden treasure; it’s all about method. With a diffuser accessory on your hair dryer, you’ll evade heat damage while guaranteeing equal distribution. This approach elevates your hair, transforming flat into fantastic without sacrificing curl definition.
Defines Curls
To define your curls using a diffuser, start by selecting the right heat setting for your hair type and applying a curl-enhancing styling product. Then, gently scrunch your curls and shape them with the diffuser attachment. Move around your head, working in small sections, and finish your look with a moisturizing shine oil. Remember to use a diffuser with extendable prongs for root lifting and to enhance curl definition and body.
Air-dry Hair 50-60%
To diffuse curly hair, you should air-dry it 50-60% before using a diffuser attachment. This allows the hair to absorb excess water, making it easier to style and reducing frizz. Here’s a step-by-step guide on how to do it:
- Remove excess water from curls gently: After washing your hair, use a microfiber towel or cotton T-shirt to absorb the excess water. Be careful not to rub your hair, as this can cause frizz.
- Apply a leave-in conditioner for moisture and even distribution: Apply a light leave-in conditioner or curl cream to your hair. This will help protect your strands and add moisture, which is essential for diffusing curly hair.
- Use a diffuser attachment: Add a diffuser attachment to any blow dryer. This attachment will help distribute heat evenly and prevent heat damage.
- Dry in sections: Start diffusing your hair in small sections, holding each section in the diffuser bowl for about 30 seconds. This will help guarantee that the heat is evenly distributed and that your curls aren’t damaged.
- Build volume: Tilt your head to the side and dry sections for volume. This will help create a natural lift at the roots, giving your curls more body.
- Keep going: Continue diffusing your hair until it’s 80% dry. You can use root clips or continue diffusing to lift roots if needed.
- Shake and go: Once your hair is dry, fluff your roots with your fingers to create volume. Scrunch your hair with hair oil to add shine and definition. Shake your head gently to release your curls, ensuring they aren’t weighed down.
Flip Head Upside Down
Flip Your Head Upside Down: A Key Step in Diffusing Curly Hair
Diffusing curly hair upside down is a vital step in achieving beautiful, manageable, and tighter curls. Here’s how to do it:
- Apply heat protectant: Before diffusing, apply a heat protectant to your curls. This will help protect your hair from heat damage and reduce frizz.
- Remove excess water: Use a microfiber towel or cotton T-shirt to gently remove excess water from your hair. Avoid rubbing, as this can cause frizz.
- Flip your head: Turn your head upside down and place the diffuser attachment on your hair. The diffuser should be positioned at the roots, with the prongs pointing downwards.
- Dry in sections: Start diffusing at the roots and work your way down to the ends. Move the diffuser around your head in small sections, holding each section for about 30 seconds.
Use Medium-low Heat
When diffusing, always opt for medium-low heat. It’s the sweet spot for minimizing heat damage, preserving hair health, and maximizing curl definition. Plus, it’s your ally in building volume and taming frizz without breaking a sweat.
| Heat Damage | Hair Health | Curl Definition |
|---|---|---|
| Avoided | Preserved | Enhanced |
| Less Risk | Improved | Sharper |
| Minimized | Protected | Defined |
Start at the Crown of the Head
Start at the crown of your head when diffusing your curly hair. This is the best place to begin, as it allows the heat to gently lift your roots and create volume. Use a diffuser attachment on your blow dryer, making sure it’s set to a low or medium heat.
Place the diffuser at the crown of your head, and use your fingers to gently lift sections of hair and place them in the diffuser cup. Avoid touching your hair as you diffuse, as this can create frizz.
Massage Scalp and Roots With Diffuser Prongs
Massage your scalp and roots with the diffuser prongs to lift your natural hair and distribute heat evenly. This step prevents heat damage and enhances curl definition.
Wait 30 Minutes Before Diffusing
Waiting 30 minutes before diffusing your curly hair is essential for several reasons. Initially, it enables your hair to absorb the moisture from your leave-in conditioner or styling products more efficiently. This is especially important for those with high porosity hair, which tends to lose moisture rapidly.
Furthermore, it grants your hair time to stabilize and consequently lessens the probability of harm from overheating. Remember, high porosity hair is more susceptible to breakage when saturated.
Finally, it allows your hair to cool down somewhat, which can help to reduce frizz and make your curls more defined. Therefore, take the time to wait 30 minutes before diffusing your curly hair for optimal results.
Wrap Hair in a Cotton T-shirt to Absorb Water
Wrap Your Hair in a Cotton T-shirt to Absorb Water: A Step-by-Step Guide
Drying your curly hair with a cotton T-shirt is a popular and effective method for reducing frizz, adding volume, and preserving curl definition. Here’s a step-by-step guide on how to do it:
- Remove excess water gently: After washing your hair, remove any excess water by using a cotton T-shirt to wring out the strands without stripping them of their moisture.
- Lay it flat: Place the T-shirt on an elevated surface, like your bed, and lay your hair on top of it. Make sure the hairline aligns with the neckline of the T-shirt.
- Secure it: Fold the bottom part of the T-shirt over the back of your head, then gather the neckline and sleeves and twist them to secure the T-shirt around your hair.
- Leave it on: Leave the T-shirt on for 10 to 15 minutes to allow the T-shirt to absorb the excess water and prevent frizz.
- Undo and style: After the allotted time, undo the T-shirt and style your hair as usual. You can apply a leave-in conditioner for added moisture and even distribution.
Use the Cool Shot Button to Eliminate Frizz
Use the cool shot button to eliminate frizz and reduce heat damage. Here’s how:
- After diffusing, cool your hair down with the cool shot button.
- This helps to seal the cuticle and lock in moisture, reducing frizz.
- It also helps to set your style and prevent flyaways, giving you a polished look.
Apply Sweet Almond Oil to Scrunch Out Crunch
To scunch out crunch and control frizz, apply sweet almond oil to your curls. This lightweight oil is rich in vitamins and minerals, nourishing your hair and promoting soft, manageable locks. Sweet almond oil can also restore moisture and protect your hair from breakage.
To use, apply a few drops to your hair and scrunch gently to distribute evenly. This step is essential for maintaining your curls’ definition and reducing frizz.
Stretch Hair Using the Tension Method
To stretch your curls using the tension method, start by applying heat protectant to your hair and detangling it. Then, gently pull your hair to its full length and use a blow dryer on a cool or medium setting to dry the section, moving the dryer down from the roots to the tips for maximum stretch.
Continue this process for each section until your hair is fully dry. This method can help reduce frizz, define curls, and enhance their natural length.
Air-dried Hair is Flat
Air-dried hair can be flat, but diffusing curly hair adds volume and tighter curls, enhancing your hair texture and promoting hair growth. Here’s how to achieve this look:
- Air-dry hair 50-60% before diffusing.
- Flip your head upside down for more volume.
- Use medium-low heat and massage your scalp with the diffuser prongs.
Diffused Hair Has Volume and Tighter Curls
Distributing curly hair with a diffuser attachment can markedly augment your hair’s volume and curl definition. The diffuser attachment operates by distributing heat uniformly across your hair, reducing frizz and promoting a more defined, voluminous appearance. Here’s a step-by-step guide on how to diffuse your curly hair:
- Prep Your Hair: Gently remove excess water from your curls and apply a leave-in conditioner for added moisture and even distribution.
- Dry in Sections: Begin drying your hair in small sections, holding each in the diffuser bowl for about 30 seconds.
- Build Volume: Tilt your head to the side and dry sections for volume, ensuring you don’t overheat any one section.
- Keep Going: Dry your hair to 80% dryness, then use root clips or continue diffusing to lift roots.
- Shake and Go: Fluff roots with your fingers, scrunch with hair oil, and shake your head gently to release curls.
Using a diffuser attachment can help you achieve a more defined curl pattern while minimizing heat damage. It’s an essential tool for those with curly hair, as it allows for gentler drying and helps preserve your natural curls.
Depends on Personal Preference
Depending on your personal preference, you can choose between air-drying or diffusing your curly hair. Both methods have their advantages and disadvantages.
Air-drying allows your curls to take their natural shape without any manipulation, but it can take longer to dry, especially if you have thick or long hair. It also minimizes heat damage and enhances the natural curl pattern, but it may lead to increased frizz, especially in humid conditions.
On the other hand, diffusing curly hair can noticeably speed up the drying process, giving you more control over the final outcome. It adds volume and bounce to your curls, making them appear more defined and voluminous. However, it may take some practice to master the technique and can potentially disrupt the natural curl pattern if over-manipulated, leading to frizz or uneven curls.
Experiment With Diffusing Before Making a Decision
Experiment with diffusing before making a choice. Try out different diffuser types, temperature settings, and personal styles to find what works best for your curl size and time constraints. Here are three things to think about:
- Choose the correct diffuser attachment: Select a diffuser that suits your hair type and desired curl definition.
- Adjust the temperature setting: Experiment with temperature settings to find the best temperature for your hair.
- Experiment with techniques: Try different diffusing techniques, such as upside-down diffusing or diffusing in sections, to see what works best for your personal style and time constraints.
Diffusing Takes About 20 Minutes
Diffusing curly hair typically takes about 20 minutes, depending on the length and type of your hair, as well as the drying technique and styling method you choose. To achieve the best results, follow these steps:
- Apply heat protectant and styling products to clean, wet hair.
- Remove excess water with a microfiber towel or cotton T-shirt.
- Dry in sections, holding each section in the diffuser bowl for 30 seconds.
- Tilt your head to the side for volume and dry sections for 20-30 seconds.
- Dry hair to 80% dryness.
- Use root clips or continue diffusing to lift roots.
- Finish your look with a moisturizing shine oil, massaging it into your roots for volume.
Remember to be gentle and avoid touching your curls during the diffusing process, as this can cause frizz and disrupt the curl pattern.
Stretching Adds 3 Minutes
Stretching your curls before diffusing adds 3 minutes to your routine, but it’s worth it for curl definition. This technique involves shaking your head gently to release curls, fluffing roots with fingers, and scrunching with hair oil. It’s particularly beneficial for those with natural hair, as it requires trial and error to find the right technique for your hair type.
Natural Hair Requires Trial and Error
To achieve optimal results when diffusing curly hair, experimentation with diverse techniques and products is crucial to determine the most effective approach for your hair type. Here are some guidelines to assist you on your diffusing journey:
- Explore various methods: Experiment with different diffusing techniques, such as Pixie Diffusing, Hover Diffusing, and Stretch Diffusing, to identify the one that best suits your hair. Each method offers distinct advantages and can enhance curl definition, minimize frizz, and amplify the volume of your curls.
- Select appropriate products: Choose styling products that align with your hair type and desired outcome. Utilize a leave-in conditioner or curl cream to safeguard your strands and provide moisture. Opt for heat protectant sprays to shield your hair from heat damage.
- Adhere to proper technique: Begin with clean, damp hair and apply your preferred styling products. Employ a diffuser attachment on your hair dryer and set it to a low or medium temperature. Gently lift sections of your hair and place them within the diffuser cup, avoiding excessive heat exposure. Move the diffuser in a circular motion as you dry each section.
- Exercise patience and consistency: Diffusing curly hair requires time and practice. Allow your hair to dry in sections, holding each for 30 seconds. Tilt your head to the side for increased volume and dry your hair to 80% dryness before using root clips or continuing the diffusing process.
- Conclude with a shine oil: Once your hair is dry, utilize a moisturizing shine oil to enhance the definition of your curls and impart a glossy finish. Massage the oil into your roots for added volume.
Frequently Asked Questions (FAQs)
Can I use a regular hair dryer without a diffuser?
Yes, you can use a regular hair dryer without a diffuser to dry curly hair. However, it may not provide the same benefits as using a diffuser, such as enhanced curl definition and reduced frizz.
To dry curly hair without a diffuser, you can air dry your hair, which can help reduce frizz and promote a more natural curl pattern. You can also use a hooded dryer or a bonnet attachment on a regular hair dryer, which can distribute heat evenly and guarantee that all sections of your hair dry uniformly.
Additionally, you can use a leave-in conditioner and gently remove excess water from your hair before drying.
How often should I wash my curly hair?
As the saying goes, Too much of a good thing can be wonderful, but with regard to washing curly hair, aim for 2-3 times a week to keep those curls bouncy and healthy.
Can I use heat protectant before diffusing?
Yes, you can use a heat protectant before diffusing your curly hair. Heat protectants create a protective barrier on your hair, reducing the damage caused by heat styling. They work by forming a thin film on the curl’s surface, slowing down heat movement, and distributing heat more evenly. This helps to prevent heat damage, especially when diffusing your curls.
How do I maintain my curls after diffusing?
After diffusing, fluff your roots with fingers and scrunch in some hair oil to lock in moisture. Let your curls set before styling or hitting the hay to keep them bouncy and defined.
Can I use a microfiber towel instead of a diffuser?
Yes, you can use a microfiber towel instead of a diffuser to dry your curly hair. Microfiber towels are designed to absorb excess water without leaving your curls frizzy or damaging them. They’re also gentle on your hair, reducing breakage and snags.
To use a microfiber towel, you can scrunch your curls after applying leave-in conditioner and styler, or assist with plopping your hair before air drying or diffusing.
Conclusion
Surely, the quest to tame your spirited curls could rival an epic adventure. But fear not, for mastering how to diffuse curly hair is your triumphant finale.
With your diffuser as your trusty steed, you’ve journeyed through moisture-rich valleys and over voluminous peaks. Now, as you stand with your curls impeccably defined and voluminous, remember that each twist and turn of your diffuser has led to this crowning moment of lustrous glory.
