This site is supported by our readers. We may earn a commission, at no cost to you, if you purchase through links.
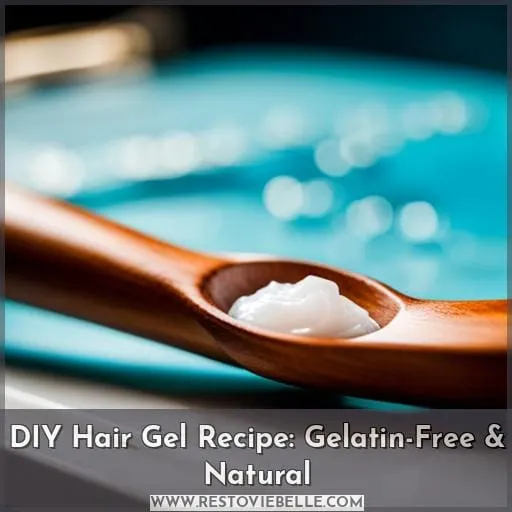 Unleash your hair’s potential with a game-changing DIY hair gel recipe—no gelatin needed. Discover the power of natural ingredients for a liberating, masterful styling experience.
Crafted with xanthan gum, aloe vera, and more, this gel offers both control and freedom, empowering you to style your hair your way. Gain mastery over your hair routine with this gel’s simple yet effective creation and usage tips.
Table Of Contents
- Key Takeaways
- Benefits of Homemade Hair Gel
- Ingredients
- How to Make It
- Tricks for Blending Xanthan Gum With Liquids
- Preserving This Homemade Hair Gel
- Optional Ingredients
- Packaging
- How to Use Your DIY Hair Gel Recipe
- Looking for More Great DIY Hair Recipes?
- Frequently Asked Questions (FAQs)
- What are the benefits of using a DIY hair gel recipe without gelatin?
- What are the ingredients in a DIY hair gel recipe without gelatin?
- How do you make a DIY hair gel recipe without gelatin?
- What are some tricks for blending xanthan gum with liquids?
- How do you preserve a DIY hair gel recipe without gelatin?
- Conclusion
Key Takeaways
- Homemade hair gel is gelatin-free and sustainable.
- It is a safe and DIY hair care routine.
- It utilizes natural ingredients for healthier hair.
- It avoids harmful additives found in commercial products.
Benefits of Homemade Hair Gel
Homemade hair gel without gelatin brings notable benefits like:
- Embracing gelatin-free alternatives
- Emphasizing sustainability in hair care
- Ensuring a safe DIY hair care routine
Discovering gelatin-free options not only caters to various preferences but also aligns with eco-conscious efforts, fostering a healthier approach to maintaining your hair. This choice ensures a natural, safe, and environmentally responsible method for crafting effective hair care solutions.
Gelatin-free Hair Benefits
Discover the abundant advantages of opting for gelatin-free homemade hair gel as your go-to hair care solution. Embrace natural ingredients for enhanced hair health, exploring DIY solutions for gelatin hair gel without compromising on styling techniques.
Unlock liberation from commercial products, gaining power through knowledge of DIY hair gel recipes, particularly hair gel without gelatin. Elevate your hair routine with aloe vera-based natural hair gel for mastery in styling.
Sustainability in Haircare
When you opt for homemade hair gel, you actively contribute to sustainable hair care, embracing an eco-friendly approach.
Sustainable sourcing of ingredients, ethical practices in production, and waste reduction align with your eco-conscious lifestyle.
By crafting your gel, you support conservation efforts, embracing eco-friendly packaging and minimizing environmental impact in your natural hair styling routine.
Safe DIY Haircare
For safer haircare, homemade gel offers a reliable alternative that prioritizes your well-being while delivering effective styling.
- Ingredient Benefits: Utilize natural components for healthier hair.
- Safe Practices: Avoid harmful additives found in commercial products.
- Storage Techniques: Employ proper preservation methods for longevity.
- DIY Experiments: Embrace creativity while ensuring safety in formulations.
Ingredients
Explore a range of natural alternatives for your homemade hair gel.
From the thickening properties of xanthan gum to the nourishing effects of aloe vera, flaxseeds, and chia seeds, each ingredient offers distinct benefits.
Essential oils add a fragrant touch, making your DIY hair gel both effective and pleasantly scented.
Xanthan Gum
Include xanthan gum as a crucial ingredient in your homemade hair gel for its exceptional thickening and stabilizing properties. This natural thickener aids in defining curls and ensuring a soft, manageable texture.
Overcoming challenges like clumping, its mixing techniques involve gradual addition to liquids or pre-blending with glycerin for better dispersion.
While xanthan gum is optimal, alternatives like guar gum offer similar benefits in DIY hair gel formulations.
Aloe Vera
Aloe vera serves as a key ingredient in this DIY hair gel recipe, contributing to its natural and nourishing properties.
- Aloe Benefits
- Enhances hair health with its moisturizing and conditioning attributes.
- Gel Consistency: Provides a smooth and manageable texture for styling.
- Preserving Properties: Aids in extending shelf life while maintaining the gel’s efficacy.
Flaxseeds
Flaxseeds serve as a foundational ingredient for this natural hair gel recipe, imparting essential properties for defining and enhancing curls. Rich in omega-3 fatty acids and mucilage, flaxseed benefits hair health, fostering natural styling.
Through proper application techniques and ingredient combinations, flaxseed gel nurtures curls, offering a liberating approach to haircare, empowering mastery over styling while embracing a natural, gelatin-free solution for beautiful, defined curls.
Chia Seeds
To incorporate chia seeds into your homemade hair gel, soak a cup of these seeds overnight for optimal results.
Chia seeds offer more than a thickening agent; they bring nutritional benefits and hydration properties to your gel.
Beyond culinary uses, their health advantages span omega-3 fatty acids and antioxidants.
Consider their growing techniques for an eco-friendly approach, enhancing both your hair and environmental consciousness.
Essential Oils
Now, delve into the aromatic realm of your DIY hair gel adventure by exploring the invigorating addition of essential oils. Choose from a variety of scents to create your own unique fragrance blend that will leave your hair smelling amazing and your scalp feeling refreshed.
How to Make It
With your ingredients gathered, you can start making your DIY hair gel. Here’s what you need to do:
- In a medium saucepan, combine 1/4 cup xanthan gum powder with 1/2 cup water.
- Heat over low heat, stirring constantly, until the xanthan gum is completely dissolved.
- Remove from heat and let cool completely.
- Transfer the mixture to a clean jar and refrigerate for at least 3 hours.
- Once the gel has set, it will be ready to use.
Your DIY hair gel will have a smooth, gel consistency and will hold your curls in place. To extend the shelf life of your gel, add 1% by weight of a water-soluble preservative, such as citric acid or potassium sorbate.
You can also add essential oils or fragrances to your gel to customize the scent.
Tricks for Blending Xanthan Gum With Liquids
To blend xanthan gum with liquids, you can:
- Use a blender.
- Mix little by little.
- Use heat.
- Combine xanthan gum with glycerin first.
Blending with a blender is the most effective method, but mixing little by little and using heat can also help prevent clumps.
Use a Blender
Blending xanthan gum with liquids is easiest using a blender.
The blender will ensure that the xanthan gum is fully dissolved and clump-free, resulting in a smooth, gel-like consistency.
Mix Little by Little
To prevent xanthan gum from clumping, mix it with your liquid slowly and gradually.
- Divide your liquid into 2 or 3 parts.
- Add xanthan gum to each part gradually, stirring constantly.
- After all the xanthan gum has dissolved, combine the parts of your liquid.
Using Heat
If you’re having trouble mixing xanthan gum with liquids, try using heat.
Simply heat the liquid until it’s warm to the touch, then add the xanthan gum slowly while stirring.
You can also add a small amount of glycerin to the mixture to help it disperse more evenly.
Using Glycerin
Using heat to blend xanthan gum with liquids can be effective, but combining xanthan gum with glycerin first will help to further disperse the xanthan gum and create an even smoother gel.
Glycerin also reduces clumping, improves texture, and extends the shelf life of your homemade hair gel.
Preserving This Homemade Hair Gel
Once you have mastered the art of blending xanthan gum with liquids, you need to preserve your homemade hair gel.
To preserve your homemade hair gel, you’ll need to:
- Choose a water-soluble preservative.
- Slightly adjust the pH down with lactic or citric acid.
- Weigh your ingredients carefully.
Optional Ingredients
You can customize the scent, texture, and benefits of your homemade hair gel by adding optional ingredients.
Proteins and vitamins can help strengthen and nourish your hair, while glycerin can add moisture and shine.
Essential oils can also be added for fragrance and added benefits, such as reducing frizz or promoting hair growth.
When adding optional ingredients, be sure to use a small amount at first and gradually increase the amount until you reach your desired results.
Packaging
After adding optional ingredients, store the homemade hair gel in an airtight container for up to 3 months.
You can use a plastic bottle, reusable container, mason jar, squeezable bottle, travel size pump dispenser, or whatever you have on hand.
Just make sure the container is airtight so that the gel stays fresh.
How to Use Your DIY Hair Gel Recipe
With your homemade hair gel recipe in hand, you can start using it to style your hair as desired.
- Apply the gel to damp hair, working it through from roots to ends.
- Scrunch your hair to define curls and waves.
- Let the gel dry completely before styling.
- Store the gel in an airtight container in the refrigerator for up to 2 weeks.
- Reapply as needed throughout the day to refresh your style.
Looking for More Great DIY Hair Recipes?
Looking for more great DIY hair recipes? You’ve come to the right place! Here are five of our favorites:
| Recipe | Ingredients | Method |
|---|---|---|
| Flaxseed Hair Gel | 1 cup flax seeds, 1 cup water | Soak flax seeds overnight, boil in water for 30 minutes, sieve to separate gel and seeds. |
| Aloe Vera Hair Gel | Aloe vera leaf, 1 cup water, Juice of one lemon | Scrape aloe vera gel, boil with water and lemon juice for 5-10 minutes, cool, apply from scalp to strands for waves or curls. |
| Chia Seed Hair Gel | 1 cup Chia seeds (soaked overnight), Half cup fresh Coconut milk, One teaspoon Dabur Vatika Enriched Coconut Hair Oil, One teaspoon lemon juice | Boil soaked Chia seeds for 15-20 minutes, add coconut milk, coconut hair oil, and lemon juice, cool, apply on wet hair. |
| Lavender Natural Hair Gel | 1 cup water, Three to four dried lavender flowers, Two spoons olive oil, One tablespoon unflavored gelatin | Boil water, add gelatin, lavender flowers, and olive oil, strain, cool, apply on wet hair. |
| Essential Oil Gel | Half teaspoon unflavored gelatin, Half cup water, 4-5 drops of any essential oil (preferably lemon or mint) | Mix gelatin with water, cool for 3-4 hours, add essential oil, transfer to a bottle, refrigerate, use on wet or dry hair. |
Frequently Asked Questions (FAQs)
What are the benefits of using a DIY hair gel recipe without gelatin?
DIY hair gel without gelatin is easy to make, affordable, and free of harsh chemicals.
What are the ingredients in a DIY hair gel recipe without gelatin?
To make a DIY hair gel without gelatin, you will need:
- Aloe vera leaf
- Water
- Lemon juice
Scrape the gel from the aloe vera leaf and boil it with water and lemon juice. Apply to your hair for waves or curls.
How do you make a DIY hair gel recipe without gelatin?
To make a DIY hair gel recipe without gelatin, combine:
1 cup of water
with alternative ingredients like flaxseeds or chia seeds.
Boil and strain the mixture, allowing it to cool before applying to wet hair for natural styling.
What are some tricks for blending xanthan gum with liquids?
To blend xanthan gum with liquids, use the immersion blender or milk frother, gradually add the gum while stirring to prevent clumps.
Heat assistance can be provided by using a double boiler.
Mixing it with glycerin beforehand helps improve dispersion.
How do you preserve a DIY hair gel recipe without gelatin?
Preserving a DIY hair gel recipe without gelatin is achievable with water-soluble preservatives.
Choose an effective option, adjust pH if necessary, and weigh ingredients accurately for optimal preservation.
Conclusion
With this DIY hair gel recipe, you can ditch the store-bought gels and say hello to healthier, more natural hair.
